This is specifically Society for Creative Anachronism (SCA) specific.
I was one of several individuals asked to make items to be used as gifts for the Middle Kingdom to East Kingdom gift baskets.
As I make pottery, I was asked to make a set of cups for Their Majesties East. These cups should be made with either Their kingdom colors or something that represents the East Kingdom.
After some thought on the idea, I accepted the request.
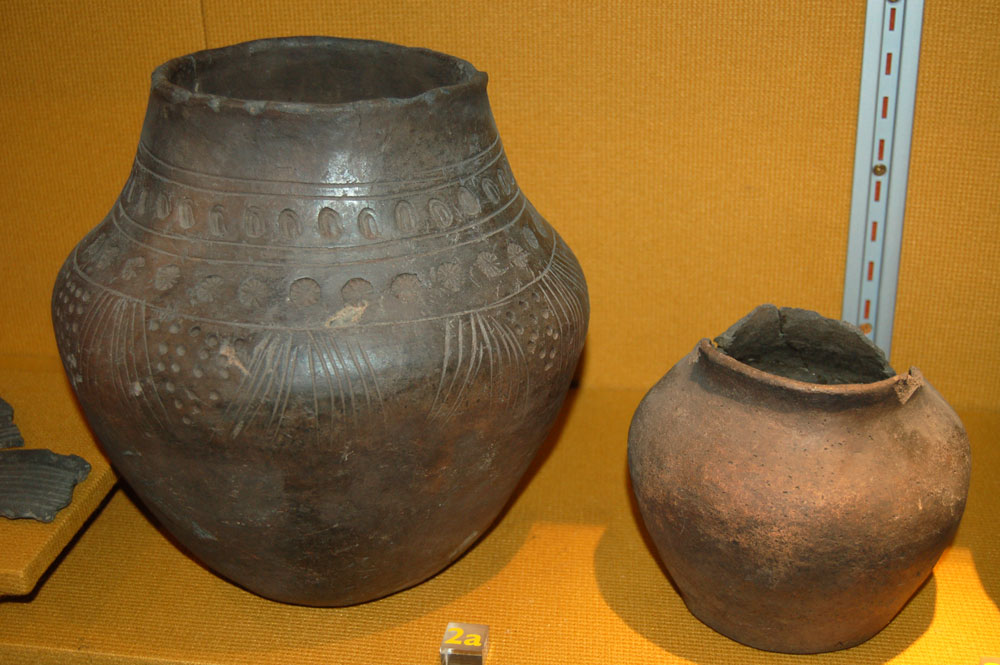
First was to decide on a style of cup to make. I chose to do a kind of basic Anglo-Saxon form for the cups. The form is generally seen in use as a funerary urn (larger urn pictured).
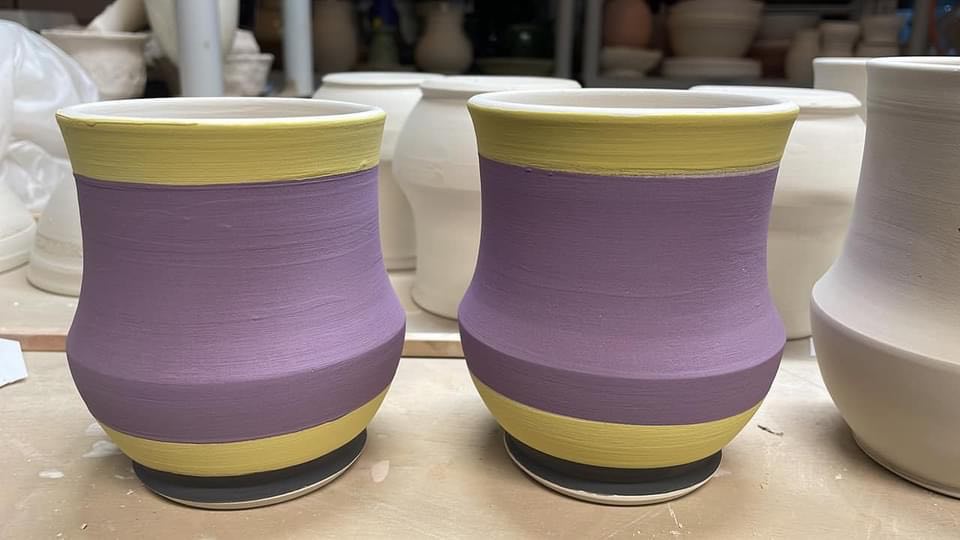
Here are the forms as I made them These have the colors of the East Kingdom. This is bone-dry clay with underglaze.
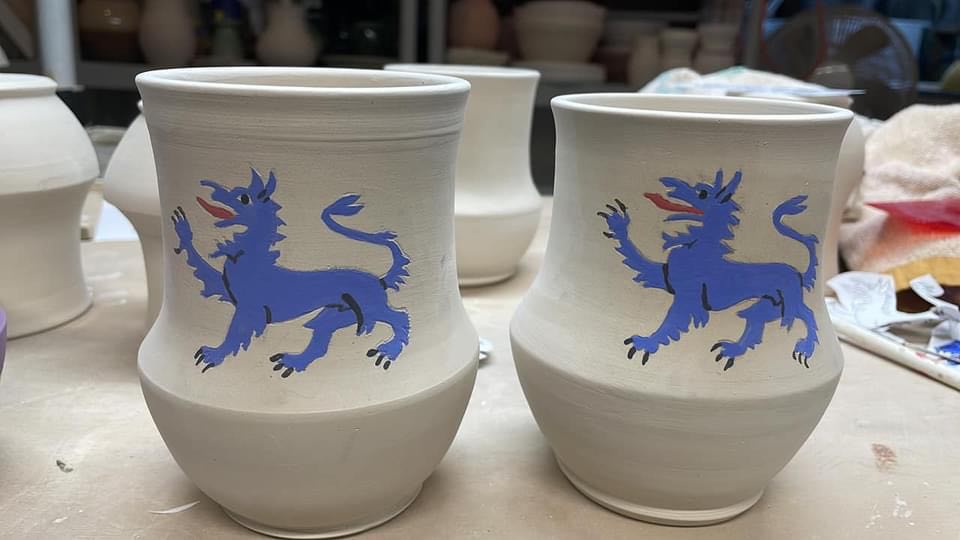
And here is a second set I made that have the East Kingdom populace badge. Also bone-dry clay with underglaze.
To add the Tyger, I reverse-image printed the heraldic art, did a wet transfer of the image along with impressing the outline with a pencil. I then filled in by hand using a very fine-pointed brush. The tongue, eye, and claws were detailed in as well.
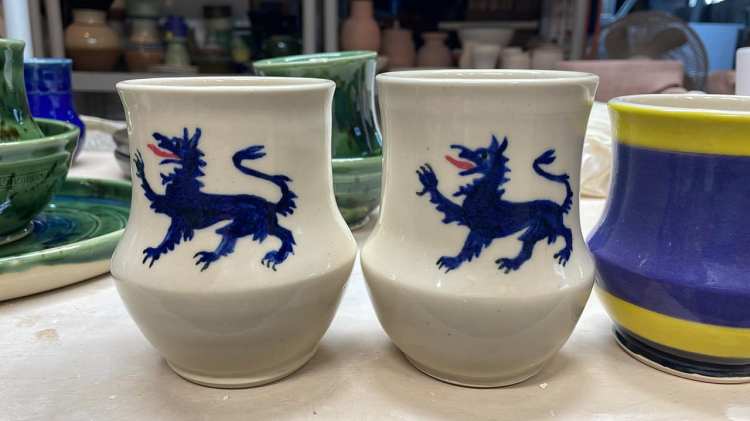
This is an image of the populace badge cups after the final firing which has a clear glaze over the bisque-fired underglaze.

And here are the East Kingdom colors on the other set of cups; also after the final firing.
Transferring the tiger image
To do the populace badge cups, I had to come up with a way to get the Eastern Tiger image onto the cups. I attempted to do the artwork freehand, but that did not come out well at all. I then decided to go the traceable art page (https://heraldicart.org/ ) and download images of the artwork.

This is the image set I chose fom to place onmthe cups. As noted above, this is an image of the PDF from heraldic art site, Book of Traceable Heraldic Art.
Once I had the artwork, I then reverse printed the page and cut out the image i wanted to use. I then dampened the cut-out and carefully placed it on the air-dry clay cup. Then, I began to use a damp sponge to press the image onto the cup so as to get the inked image to transfer. This sort of worked, but not as well as I had hoped. So, I let the clay dry again, and then carefully removed any traces of the transferred ink from the cup.
Attempt #2. Again, I cut out the image, moistened it, and placed it on the cup. This time, I used a pencil to trace the outline of the image and impress the shape into the damp clay. This worked sufficiently enough that I was then able to color in the outline using the underglaze and small, fine paint brushes. I painted on two coats of underglaze for the base. I then decided to add small pops of color by adding in the details for the tongue, claws and eyes.
Once both cups had the design drawn onto them and they were dry, I placed them into the kiln with the rest of a load of pots and fired them for the first time. After the pots survived their first firing, I then planned out my second firing to complete the process on the cups.
In preparation for the second firing, I dipped the cups in a clear glaze slurry and set them aside to dry. I continued this process with outher pots; dipping into colored glaze slurries or doing multpile dips to get drip effects on the pots to add color, motion, and interest.
Once all the necessary pots were coated in the requisite glaze, I began loading the kiln (electric). Once the kiln was loaded, I began the final firing process.
