Gilebert le braceeur de Dijon
For nearly 6,000 years, a simple device has aided mankind in the making of ceramic pots. This item is the potter’s wheel. From simple hand wheels to assist in the making of hand-built coil pots to the faster production of the kick-wheel or the stick-wheel, all fall into a category called momentum wheels. Baldi, J.S., “How the Uruk Potters Used the Wheel”, EXARC, YouTube, 2020
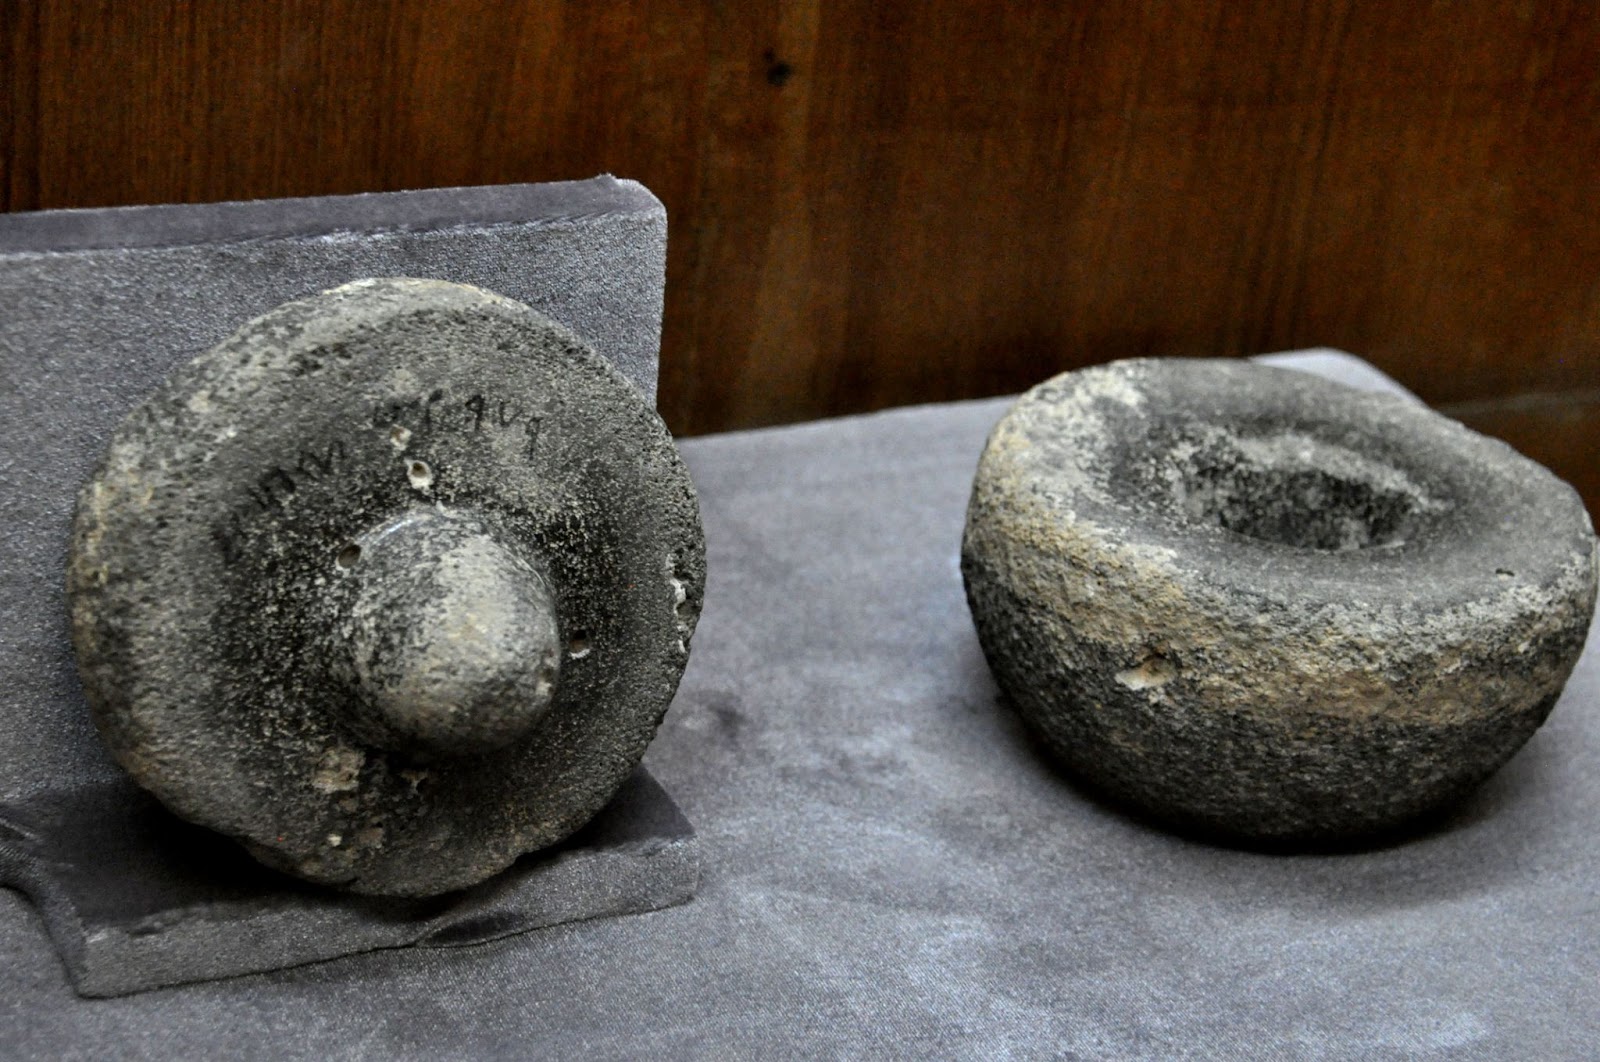
Stone potters wheel – 2000 – 1500 BCE – Mesopotamia, Iraq – Amin, O. S. M. (2014, July 30). Rotating Device of a Potter’s Wheel. World History Encyclopedia. Retrieved from https://www.worldhistory.org/image/2830/rotating-device-of-a-potters-wheel/
The above image of the stone potters wheel is classified as a rotary device. It had to be turned by hand to rotate the pot being made. This device did not maintain a constant rotation through rotational kinetic energy. It was used to refine coil-built pots.
I chose to build a stick wheel as I felt it was within my means and abilities. After seeing images of stick wheels in several manuscripts, and watching videos of modern indigenous peoples using ancient technologies, these helped me set my goals.

Jeremia visits the house of the potters, Petrus Comestor, c. 1495, Biblioteca Municipal de Lyon Rés Inc 58, f. 92

Detail from the Biblia sacra moralisata, 1235-1245, BNF Latin 11560, fol. 141v

Saint Augustin, detail in De Civitate Dei, Raoul de Presles (Livre I-X), 14th century, BNF, Département des Manuscrits, Francais 22912, folio 227v.
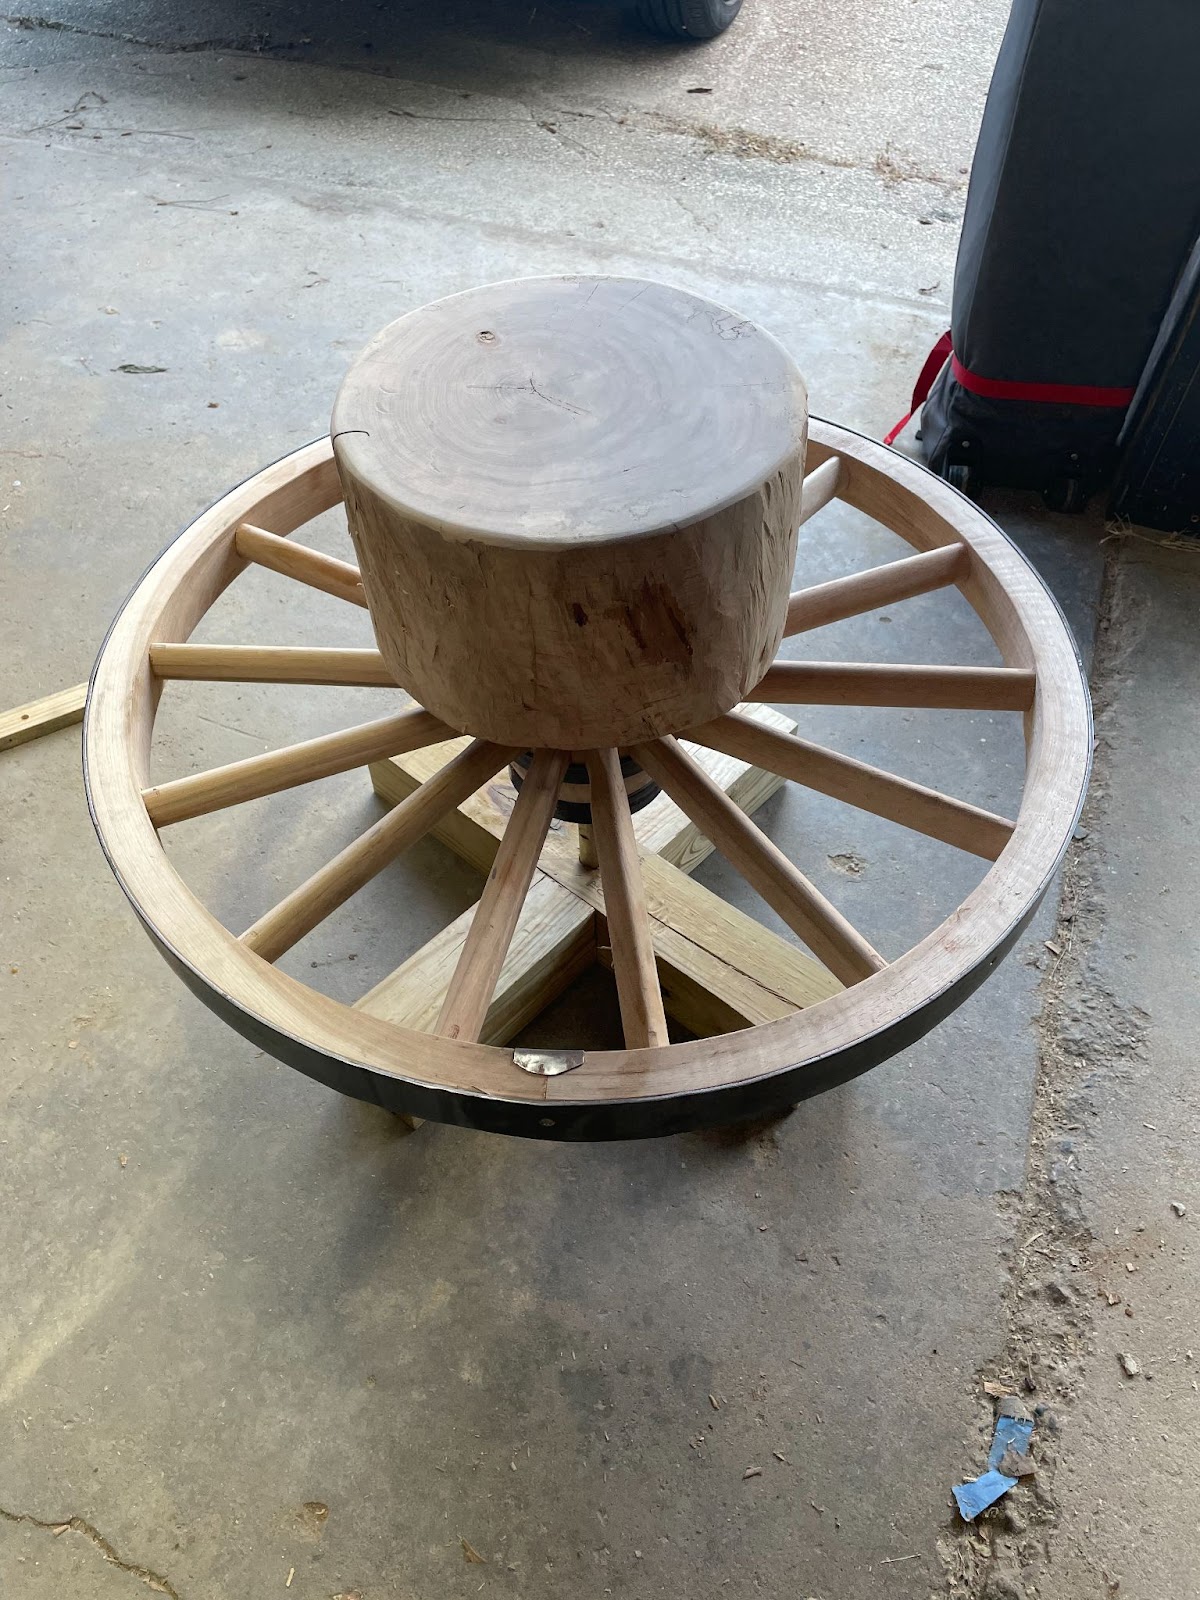
My wheel
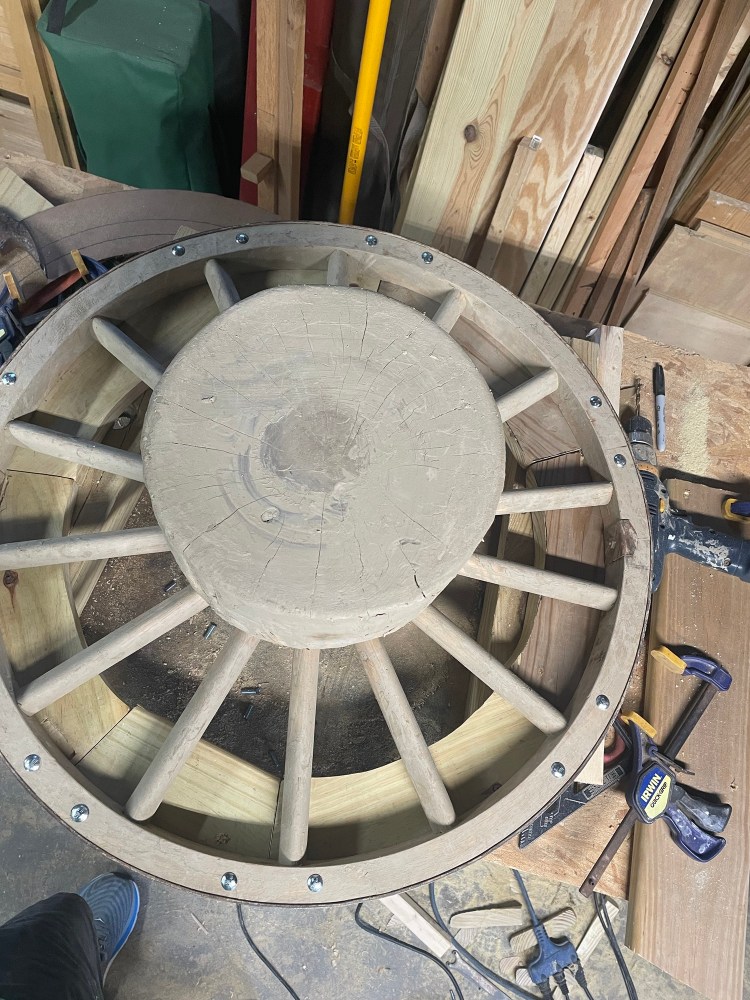
Wheel has been updated to add more mass to extend the rotation time. The additional mass was added under the wheel along the outer circumference.
Making the Potter’s Wheel
The momentum wheel uses rotational kinetic energy: energy created by the rotation of the object. The initial energy is applied by the potter using a stick to create rotation. Once the wheel has reached a speed that the potter desires, turning of the clay can begin.
The wheel I built is made in such a way that I can take it apart and transport it to other locations for use or demonstration. I used a modern steel shaft1 and bearings(2) for the axis, a 30 inch diameter by 2 inch thick wooden cannon wheel3 (purchased), a piece of maple log I had available, and some scrap 4×4 lumber. A more period-style wheel would have a flywheel of wood, stone or fired clay, supported by a shaft embedded in the ground or some supporting structure, and use water, animal fats or plant oils for lubricants. (https://www.jstor.org/stable/642550?read-now=1&seq=2#page_scan_tab_contents)
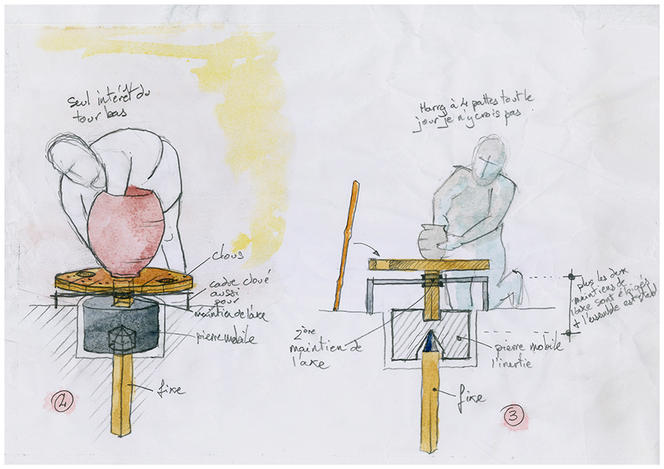
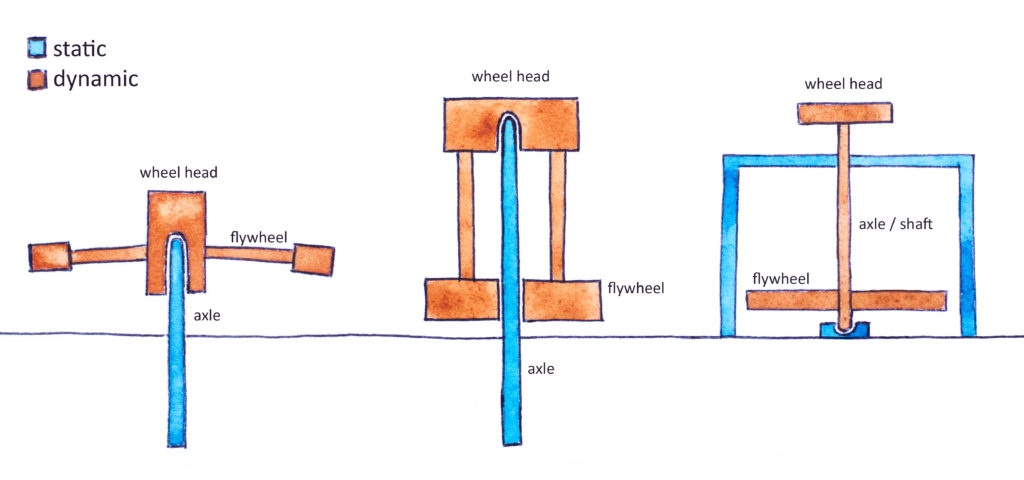
One reconstruction drawing of a momentum wheel from Pompeii (see below) shows a shaft buried in the ground that supports the pivot point for the stone weight which provides the momentum for the wheel head. (https://news.cnrs.fr/articles/tracing-back-the-potters-of-pompeii)
The image below is from an article on quora.com
(https://www.quora.com/How-did-the-ancient-pottery-wheel-spin)
This article show possible ways the wheel was situated for use. From left to right: low-height flywheel potters wheel, seated-height hand or foot powered wheel, basic form of a modern-style kick wheel.
I used the materials I had access to in a short amount of time – 5 weeks before Pennsic 50.. I was able to get the steel shaft and bearings from my place of employment for free (obsolete equipment spares). I purchased a wheel from a seller that I considered would fit my needs – a 30 in diameter by 2 in thick cannon wheel.
I chose to use the cannon wheel as I felt it gave me the best option to achieve a usable item with the least amount of modification to the base wheel. I looked at the diameter, thickness, and weight that would best serve the needs of the project.
The wheel head was made from a piece of maple log I had sitting in my garage. To get the shape I needed, I had to first cut to the height I wanted and create roughly parallel faces. I then determined the largest circular diameter I could get from the egg-shaped piece of wood and proceeded to remove material using a mallet and chisel.
When I first used this wheel, it seemed to work well. I did find that I did not have a long period of rotation to work the clay. This meant I had to do a lot of pushes with the stick to get the main pot thrown before I could do more slow work to finish the form.
Using this wheel, I was able to produce pots that may have been created in the past. There was some adjustment to my personal technique in throwing to get the most use of the momentum imparted to the wheel on each successive re-application of energy.
Over a few months of use, I noted that the wheel was getting harder to spin until it got to the point of not being able to do one full revolution. Upon investigation, I found that the bore through the wheel hub had swelled from moisture. I removed the wheel from the shaft, then removed the head from the wheel, and using a Forstner bit on a drill, I resized the bore of the wheel. The wheel now spins much easier and better than when first built.
To Throw a Pot
When beginning to throw a pot on the wheel, I first would moisten the surface of the wheel head. Then, I place the lump of clay, size depending on the type of pot to be thrown.
At this time, I apply the first of several energy pushes to the wheel. I place the stick between spokes and against the outer rim of the wheel, and begin pushing the wheel. Once the desired speed is achieved, I begin to center the clay on the wheel head. This may take a few pushes to achieve proper centering.
Once centered, the wheel is again pushed to speed and I then begin to open the clay and prepare to start making pulls to lift the clay up and create a basic cylinder. This may take multiple pushes of the wheel to maintain the necessary momentum.
At this time, I begin to form the pot into the desired shape. Instead of trying for maximum speed with each push of the stick, I adjust the speed to prevent the pot from collapsing due to centripetal force. The taller and larger the diameter, the more easily the pot will fail under too much wheel rotation speed.
As the pot gets closer to being finished, I now will apply force by hand to the wheel to control the speed even more for better control and delicate movements.
During this process of working the clay on the wheel, I use a small amount of water to provide lubrication between my hands and the clay. Quite often, after each push with the stick, I will wet my hands before touching the clay. I found that I could not rest the sides of my hands on the wheel head. This would cause the wheel to slow down quicker, thus making it take longer to throw and refine the pot.
Impressions working on a stick wheel vs an electric potters wheel
The main impression between using a modern electric wheel and a period-styled momentum wheel, is the amount of physical energy needed to maintain the wheel speed to do the initial three parts of the throwing process – centering, opening, and pulling the basic pot.
The function of creating the pot is minimally different. The same techniques are used for making a pot on an electric wheel as on a momentum wheel.
Another difference is that on an electric wheel, the clay used can be stiffer than the clay used on a momentum wheel. This means that the clay needs to be just a bit wetter in order to have it be more easily worked on the momentum wheel. Electric wheels provide a steady and constant source of torque to offset a slightly drier, stiffer clay body.
When making pots on an electric wheel, I need to reduce the speed of the wheel by using the motor control pedal. If the motor speed remains high, I would not be able to make pots that have any width to them as the centripetal force would cause the clay to fly apart or flop into a mess if wet clay bits.
Whereas, on a momentum wheel, the natural rotational slowdown aids in the forming of the pot and allows me to make pots such as wide bowls or vessels with a large belly.
Using a slighter wetter clay on the momentum wheel also means that you need to be extremely frugal with your external water usage. When too much water is added to clay it begins to break down.
Future Experiments
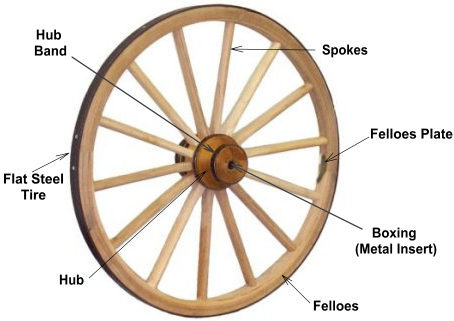
One of the future plans for the current momentum wheel is to increase the weight of the wheel. I will do this by adding additional wooden felloes to the outer diameter. This additional weight will increase the duration of the rotation needed to throw the pot with fewer pushes.
Other experiments will be in building wheels based on archaeological information. Experimenting with different types of momentum-mass (stone, wood, fired clay), different types of pivot/bearing methods (copper plates, wrought iron, stone or pebbles), and different forms of lubrication (lard, grease, water, vegetable oils).
In terms of throwing pots, I plan to experiment on larger forms. So far I have only thrown pots from approximately one pound of clay. I will be experimenting on throwing pots of larger amounts of clay to make items such as bowls, jugs, and storage jars of various sizes. These larger pots will take more refined control of wheel momentum and clay body development.
GLOSSARY
Centering: Technique to move the clay in to a symmetrical rotating axis in the middle of a wheel head so you can throw it.
Throwing: Creating ceramic shapes on the potter’s wheel.
Pulling: the method used to raise the sides/walls of the pot. Placing your non-dominant hand inside the pot, and your dominant hand outside the pot, apply pressure and squeeze the clay to move it upward.
Rib: Tool used to shape, smooth, and/or scrape clay surfaces; usually wood, rubber, plastic, or metal, either rigid or flexible, with straight, curved, or profiled edge.
Opening: The process of throwing to create the void that defines the inner volume of the form
Building my Momentum Wheel

This is the wheel I purchased for this project

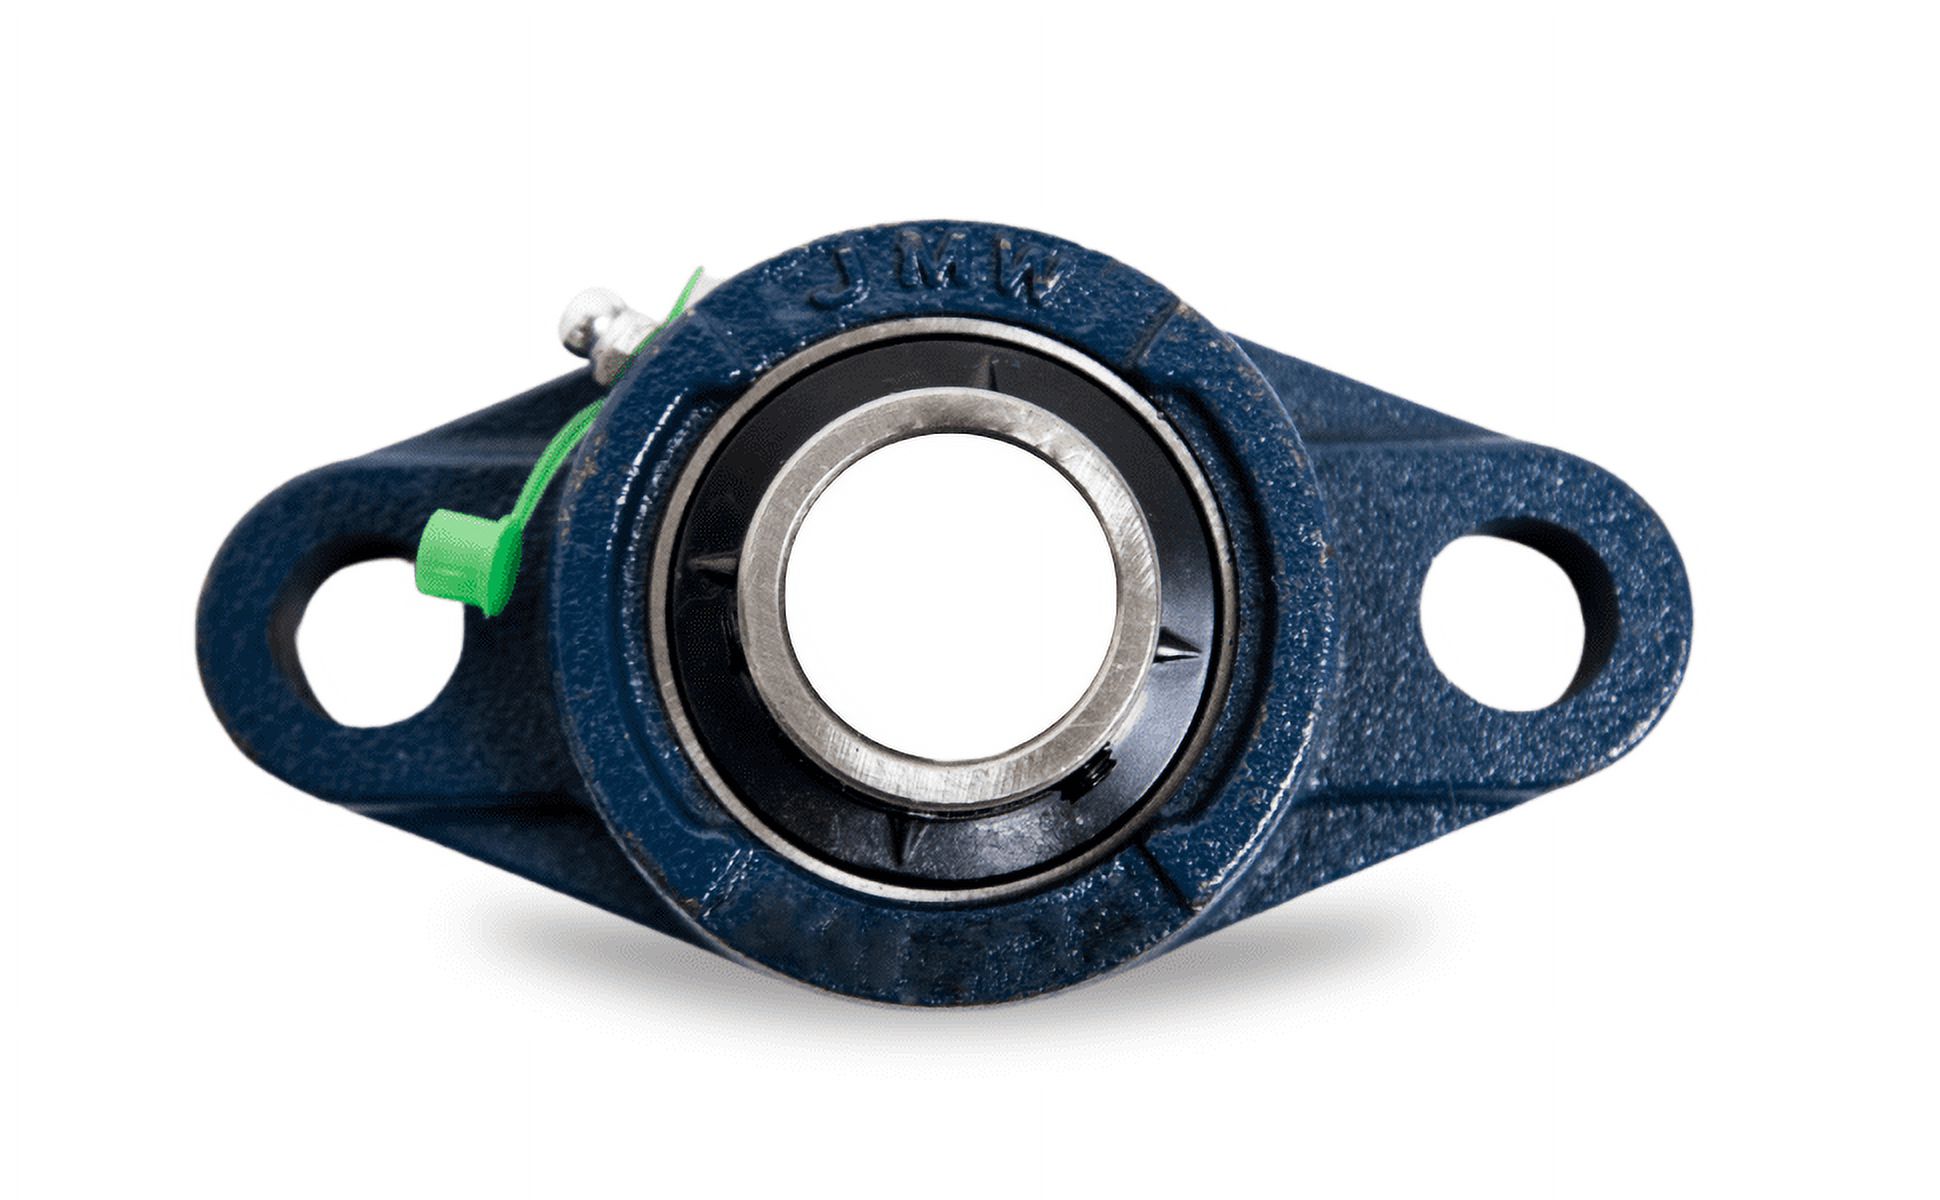
Modern shaft and bearings used to make this wheel

After carving out the socket for the bearings to sit in using a router

Wheel head before making round-ish and parallel. This was immediately after cutting the section from a log.

Removing material to make the wheel head top-to-bottom parallel

Marking the center and outer circumference to make the head round

Carving out the bottom of the head to make a socket to sit on the wheel hub.

Simple half-lapped 4×4 base with a hole to fit the 1 inch axle shaft

Finished wheel.
Using the wheel for the first time.
Parts — NOT SPONSORED
- 1″ Stainless Steel Rod, 304 Stainless, 1 Inch Solid Round Rod (18 inch long)
https://www.amazon.com/Stainless-Steel-Inch-Solid-Round/dp/B0CNLYYDJY?th=1 ↩︎ - UCFL205-16 Pillow Block Bearing (2 Pack), 1 inch Bore, 2-Bolt Flange Mounted, Solid Base, Self-Alignment
 ↩︎
↩︎ - Heavy Duty Cannon Wheel or Western Wagon Wheel With ASH Hub Sizes (24″, 30″ , 36″ , 38″ , 42″ and 48″)
Etsy – amishwares ↩︎
