This is a discussion of the methods I have used to fire pots in a barrel firing. This is the process I used in an attempt to get results similar to those one would get by firing in a dug pit.
What is pit-firing?
This kind of firing is known to have existed and been (and still ) used for approximately 6000 years, there is no one single definition. The concept is that pots are placed in a pit kiln (or similar substitute), a fire built under, over, or both, and sometimes covered after some amount of time to produce certain effects due to lack of oxygen (reduction firing). Pit kilns have been dated to at least the Iron Age and Roman Era, and have been found to be circular or square/rectangular in shape.
I will try to give a more visual and written definition below.
. Pit firing Ceramics : Modern Methods, Ancient Traditions. Schiffer Publishing, Ltd.")
- Image: Illustration of pit for pit firing. 1
- Pit firing is a method of baking the greenware pots to harden and convert the formed paste into a usable vessel.
- The “pit” that the pots are fired in can be as simple a shallow hole dug into the ground like those that are often used for campfires, to purpose dug pits that can be as deep as 2 meters and as wide. These deeper pits can be lined with clay and/or stones so that they can be reused multiple time.
- A fire is then built in the pit, with pots arranged around the pit to allow the pots to warm; which helps to drive off some of the moisture in the clay. This is called the preliminary fire.
- Once this prelimary fire has burned down to coals and ash and while it is still hot, he pots are place into the pit in a pre-decided order based on size and usage. After the pots are stacked into the pit, more fuel is added to the pit covering the pots and around the sides. This is the secondary fire.
- Depending on the potter, the type of pots, or tradition, pieces of broken pottery; called cover(ing) sherds; are placed under and/or over the pots. These sherds will help keep the pots out of direct contact with the fuel and will allow only the heat and flames of the fire to make contact with the pots.
- As the secondary fire burns, more fuel is carefully added to ensure that there is sufficient heat to fully fire the pots. The fuel is added in such a way as to not damage the pots in the fire nor create too much heat in any one area. This is a skill learned by practice and shared experience.
- As an alternate method, the wares can be loaded into the pit over a pile of fuel. The pots can then be covered with sherds and that covered with mud or mud/straw to form a dome. There needs to be an opening to start/feed the fire, and an opening in the mud dome to allow heat and smoke to rise.
I will start with a list of items and materials I used.
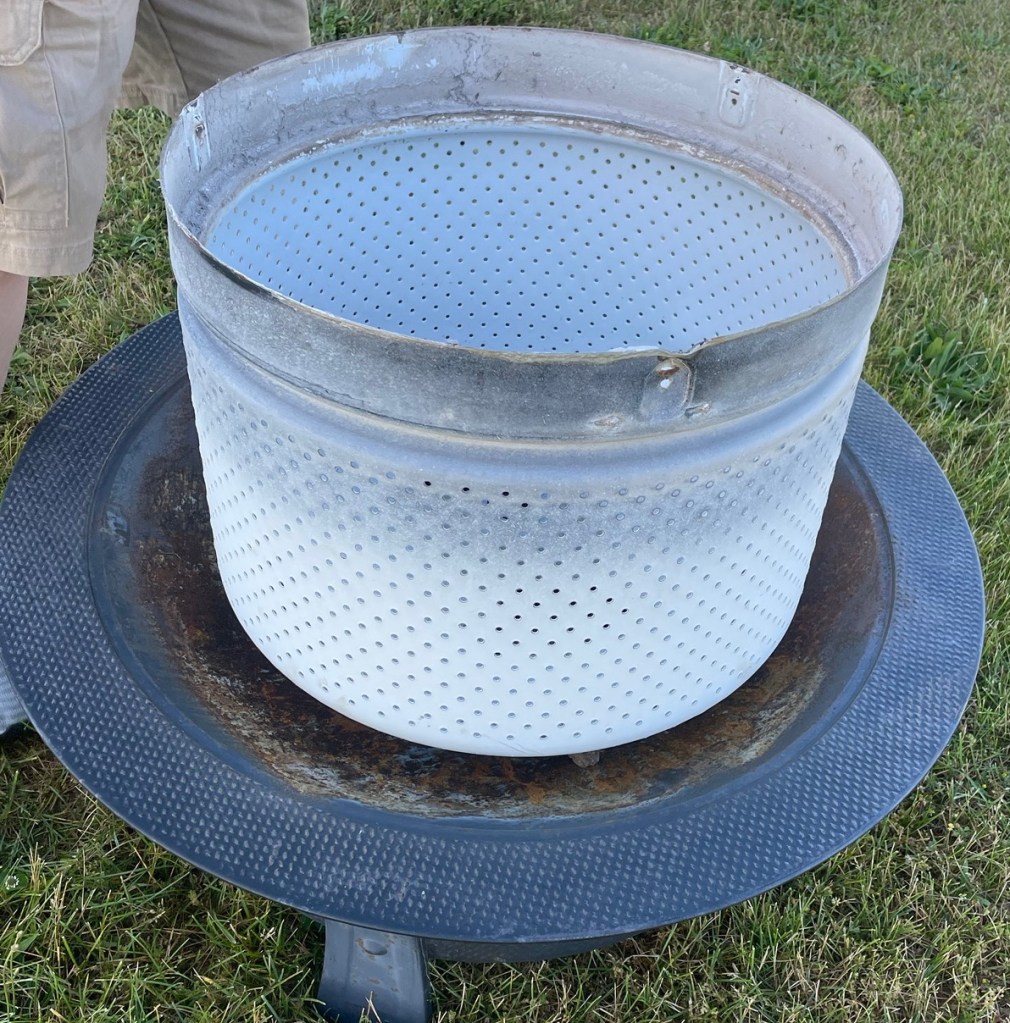
- Backyard fire pit base
- Metal washing machine drum
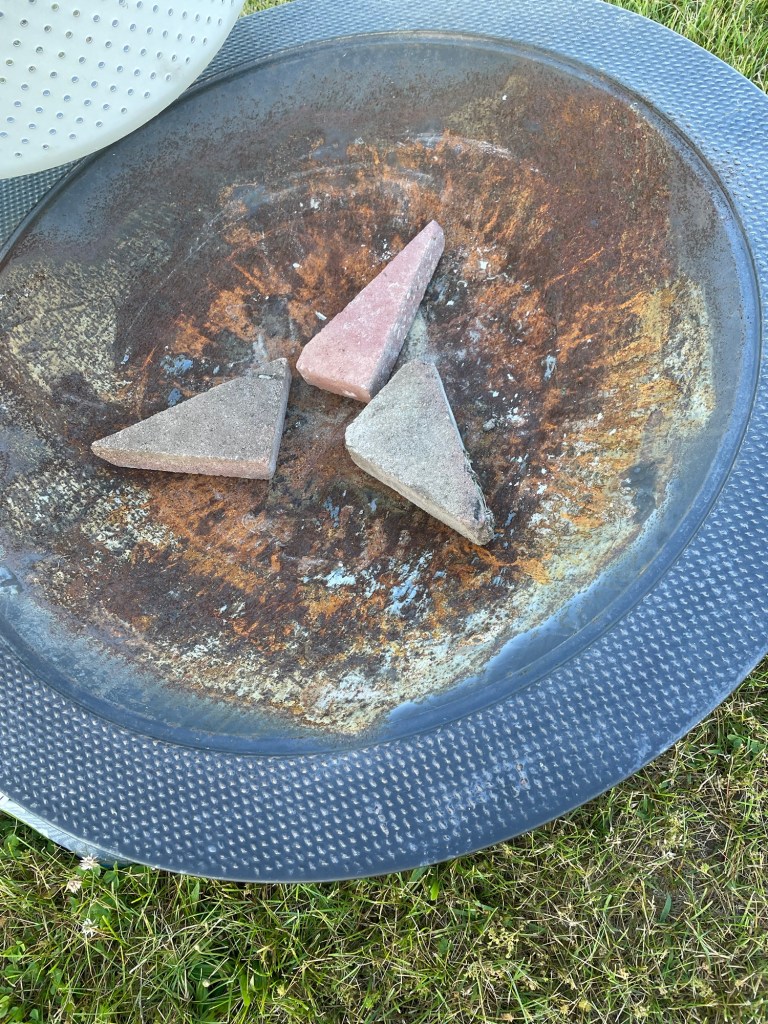
- Pieces of patio paver
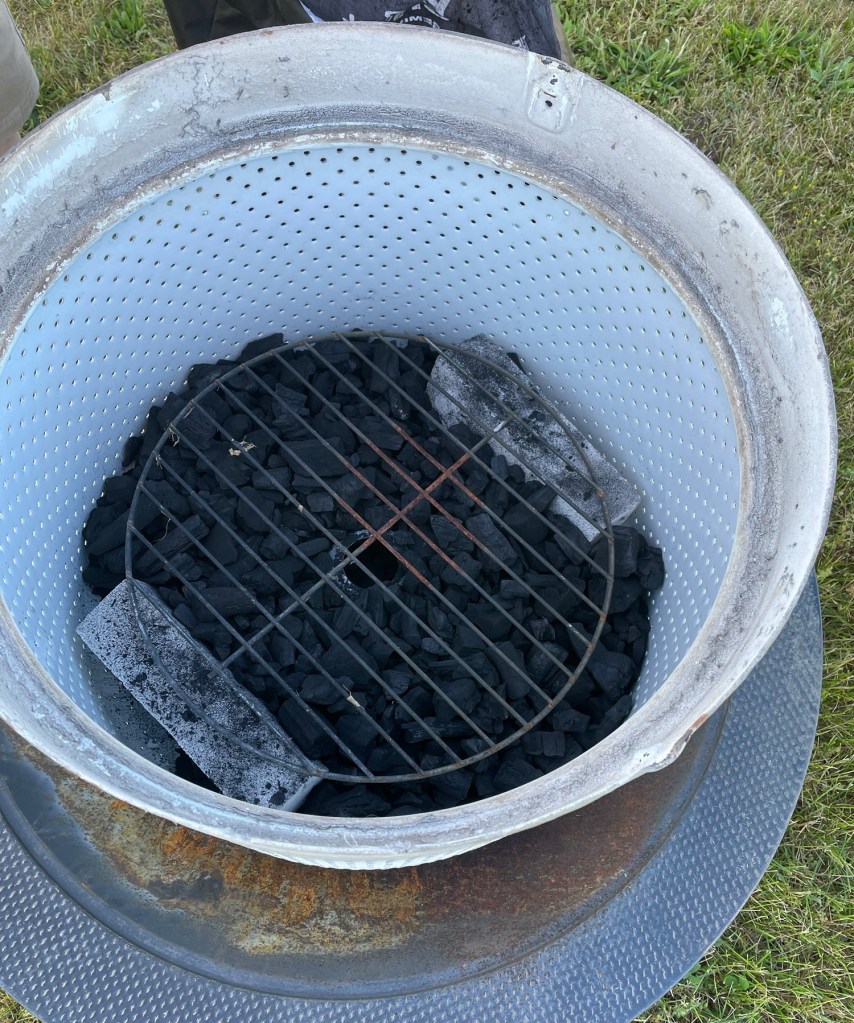
- Two fire brick
- Steel grate from grill
- Lump charcoal
- Newsprint paper – used to wrap the bone-dry pots for transport
- Pottery
- Hand processed clay
- Cone 04 – 2 clay – Laguna 103 Red Clay
- Cone 5 clay – Laguna B-mix 5 white stoneware – 1 bone dry, 1 bisqued
My purpose to this firing was to use a modern method in an attempt to achieve results similar to those one might get using a traditional in-ground pit fire.
This method will allow me to do firings in an urban environment or at a location where ground fires are not allowed.
This firing was done at an event that was held at a fairgrounds. There was a steady breeze all day during the firing. I believe that this breeze increased the tempurature of the firing.
I started by setting up the backyard fire pit and placing the pieces of patio paver under the steel washing machine drum.
Once the fire containment was set up, I added the fire bricks, some charcoal, and the grate.
I then added some of the newsprint paper and the pottery to be fired.
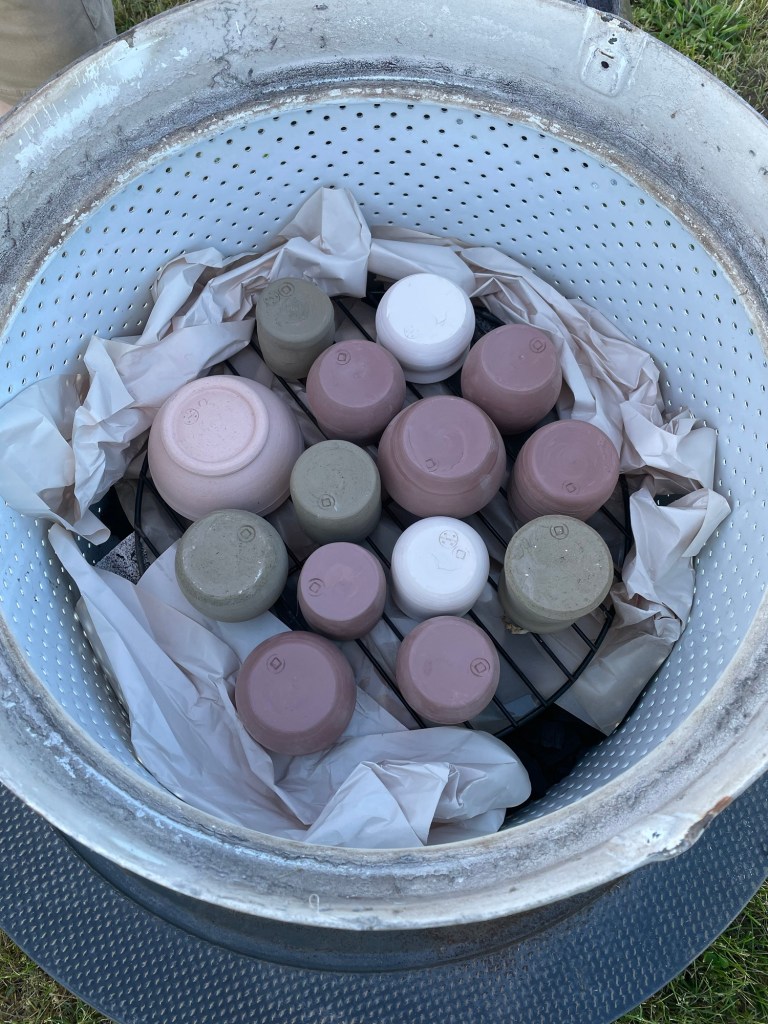
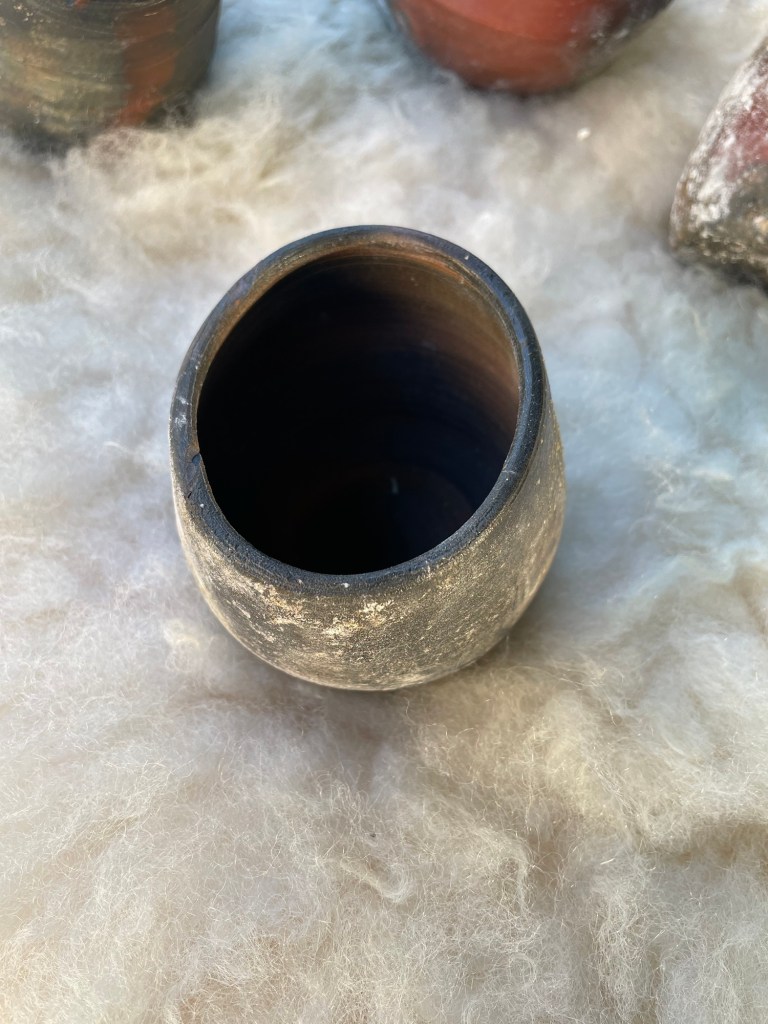
I placed the pots in with the bases up so that the inside would not be presented to the charcoal. This keeps the inside clean to better observe the clay after firing.
And finally, I carefully covered the pots with more charcoal and set the fire.
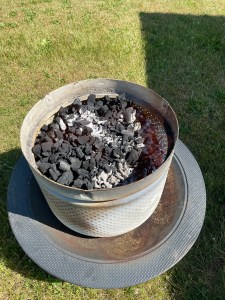
This is about mid-fire. I can see the charcoal is producing good heat.
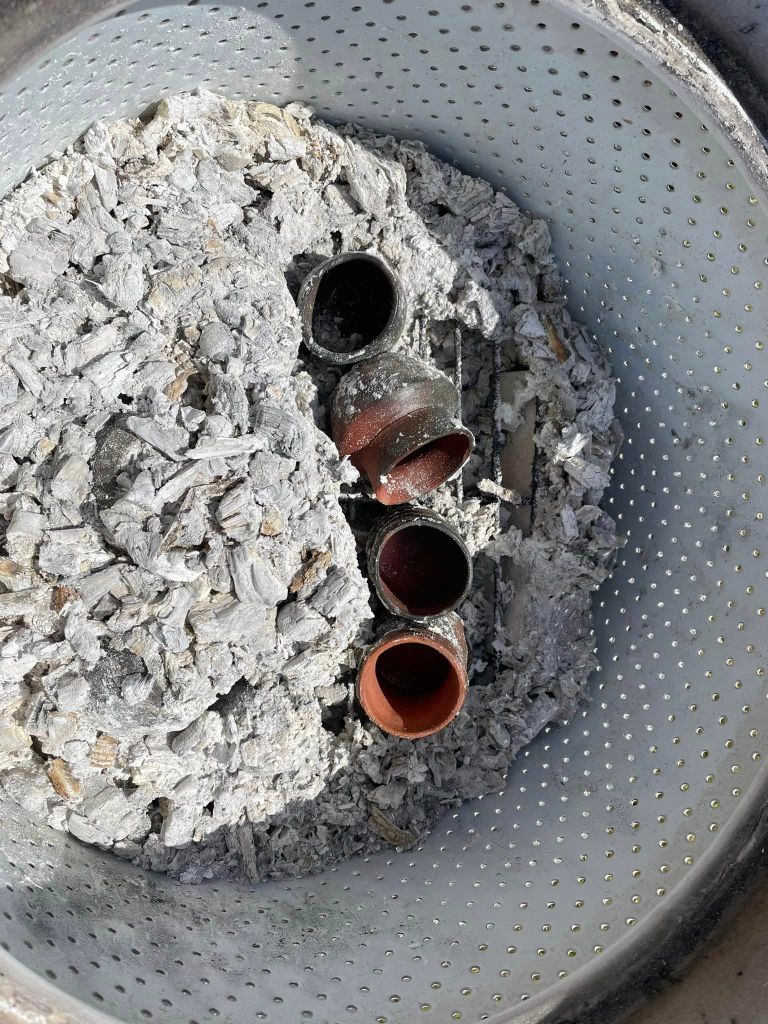
A first view of the pots inside the barrel kiln before removal. When I saw these pots, I suspected that the heat had gone too high.
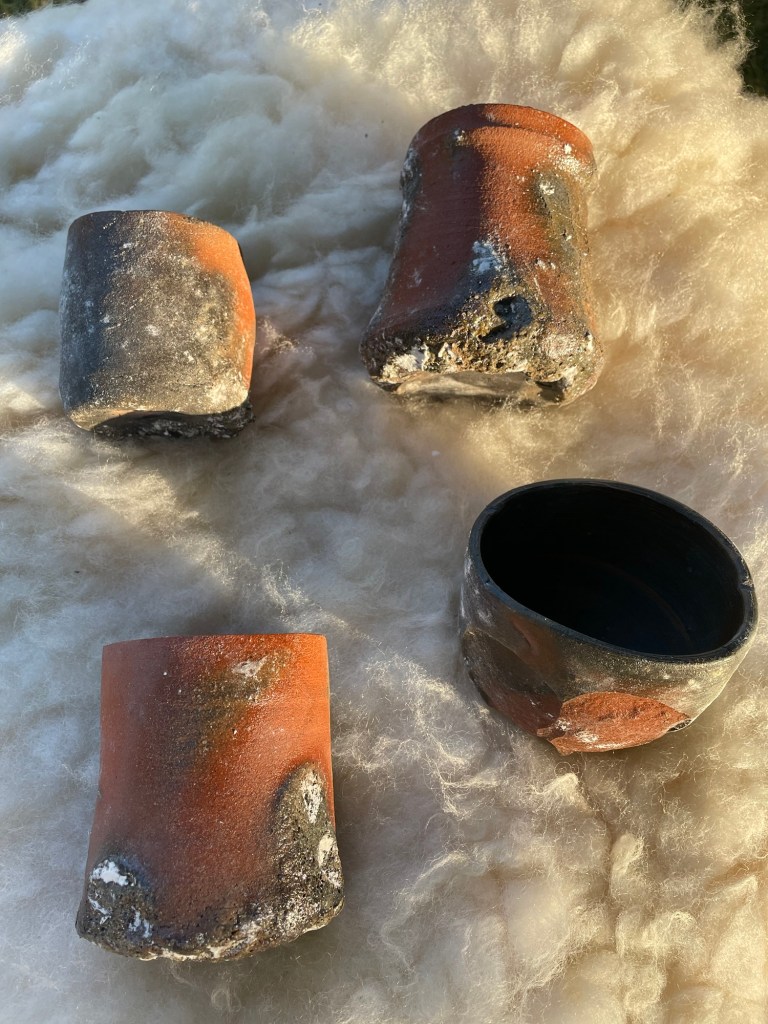
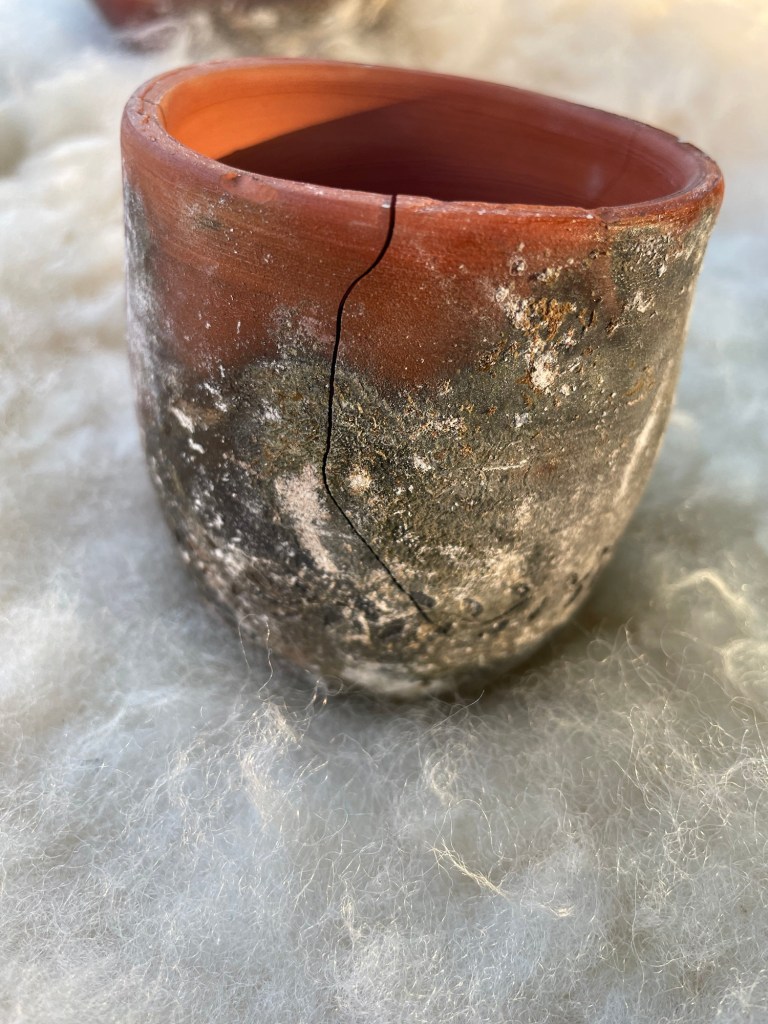
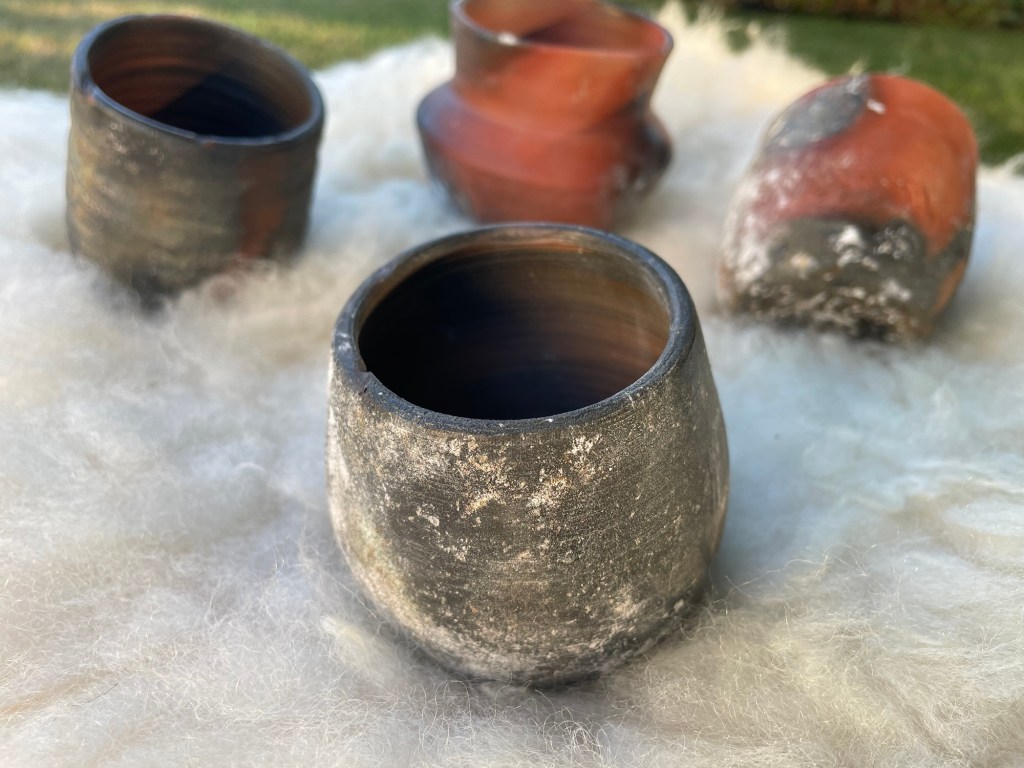
Below are images of the pots after the firing. There are two types of caly represented here. Dug and processed earthenware caly, and a commercial clay.

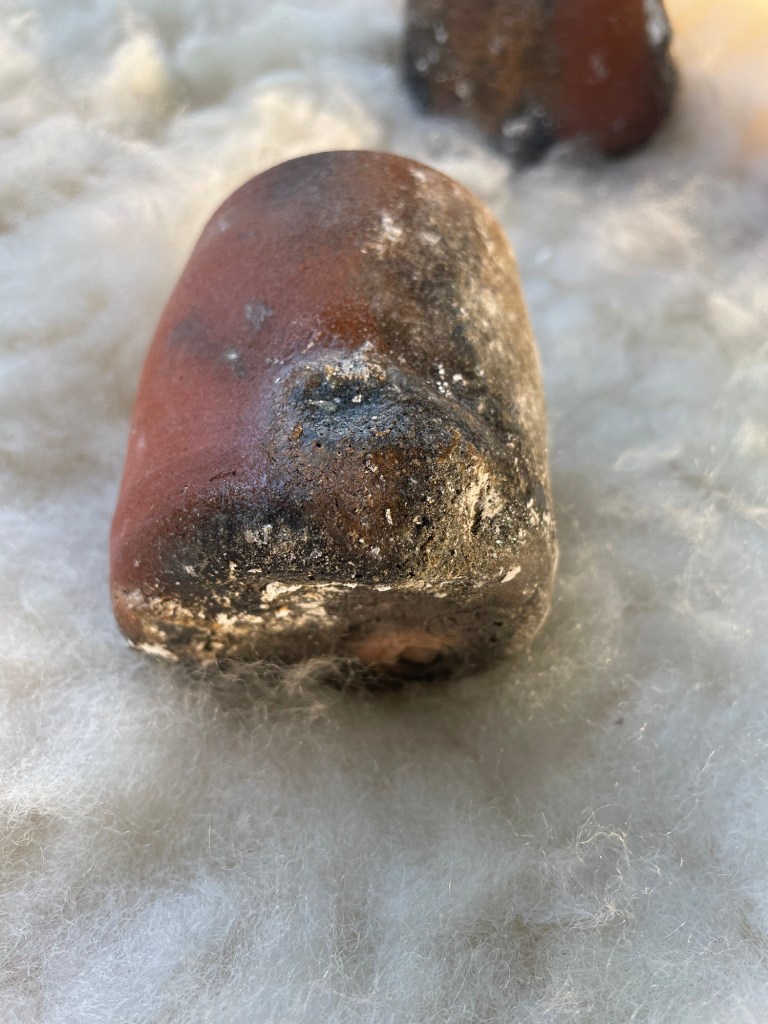
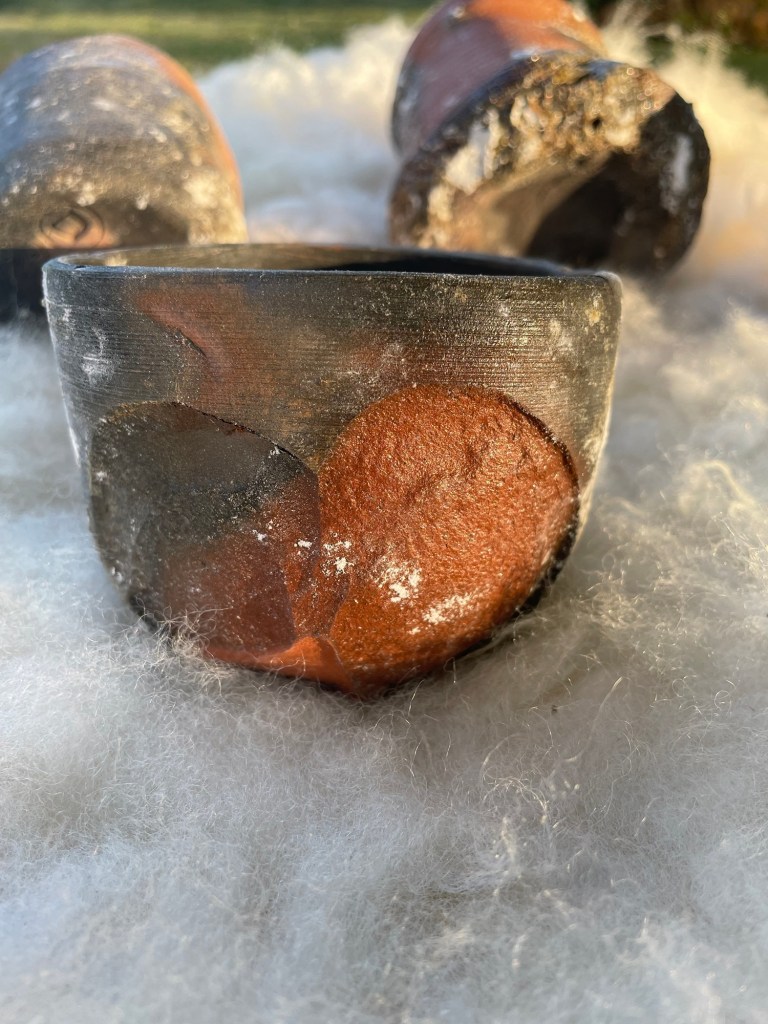
Earthenware pots post-firing. Observing the pots shows that there was enough heat from the charcola to melt the clay. I can see places where the clay has just begun to melt and has a shiny, plastic-looking textture, and I can also see where the pots have started to slump; deform and begin to collapse; and the clay looks like it has boiled and bubbled.
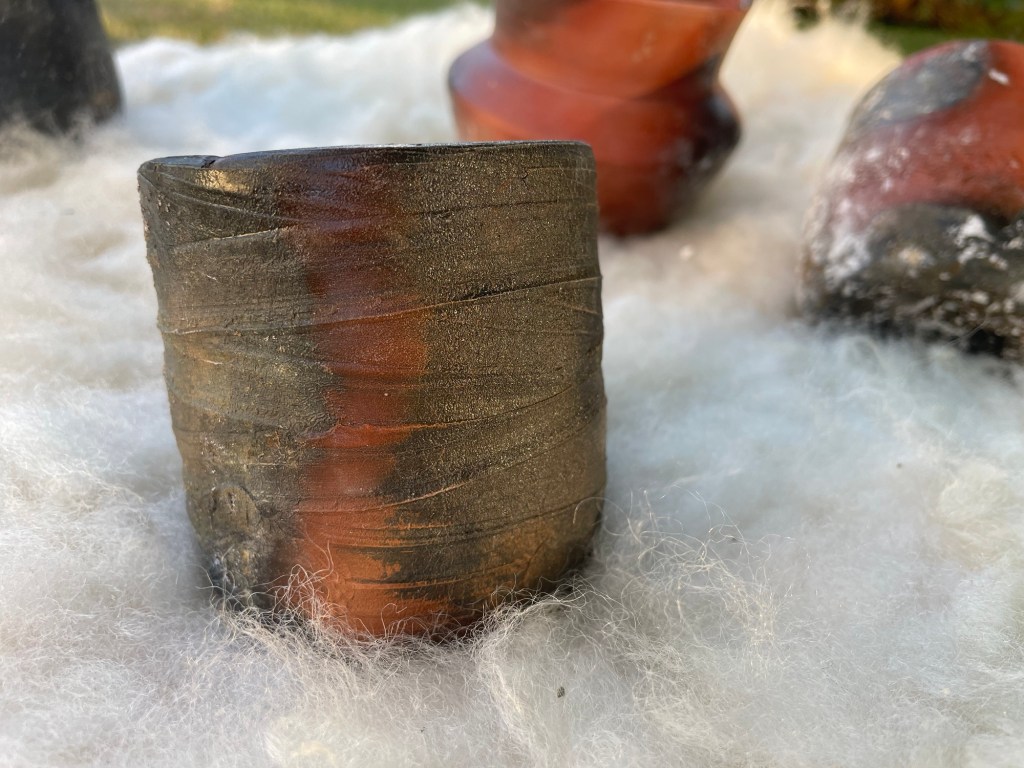
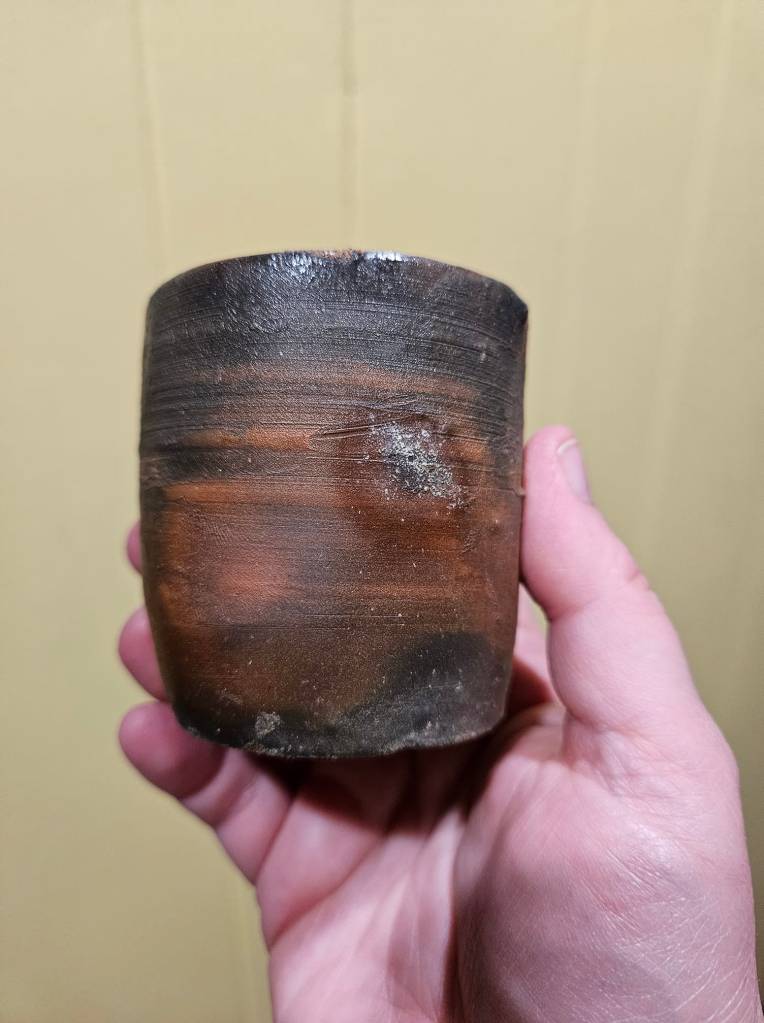
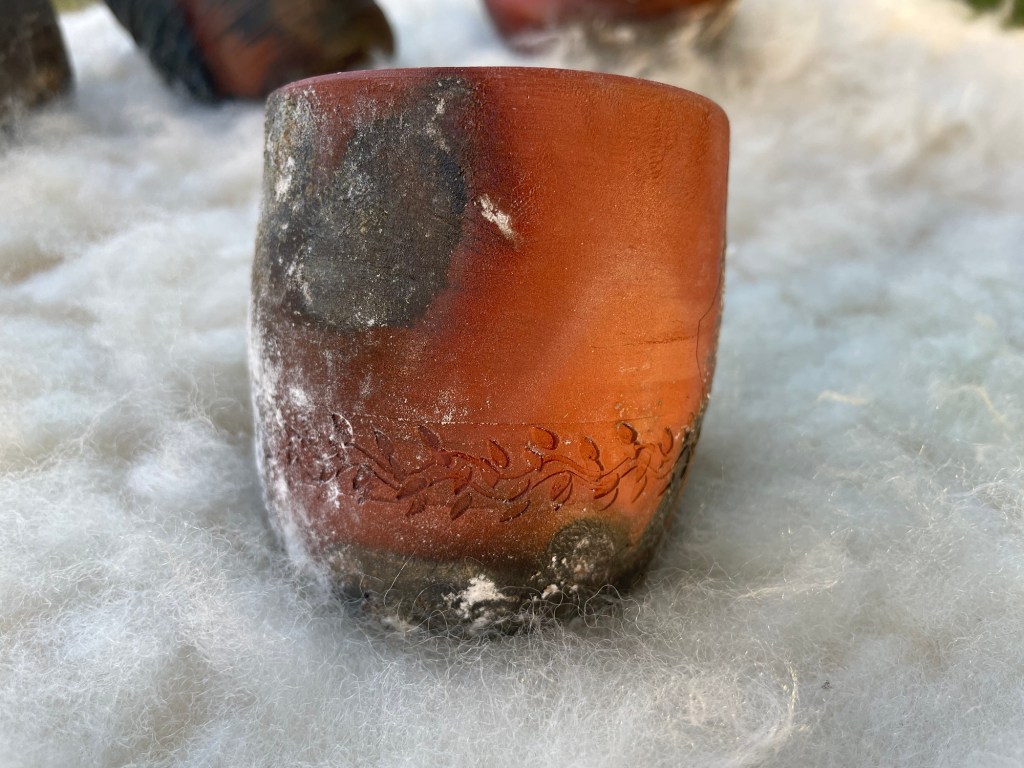
Commercial Clay pots post-firing. These pots were made from a commercial clay that has a firing range of cone 04 (1945 F) to cone 2 (2088 F)2 . The pots all show varying degrees of carbon trapping3. There is also evidence of the ash being converted to a shiny, glaze-like surface treatment.
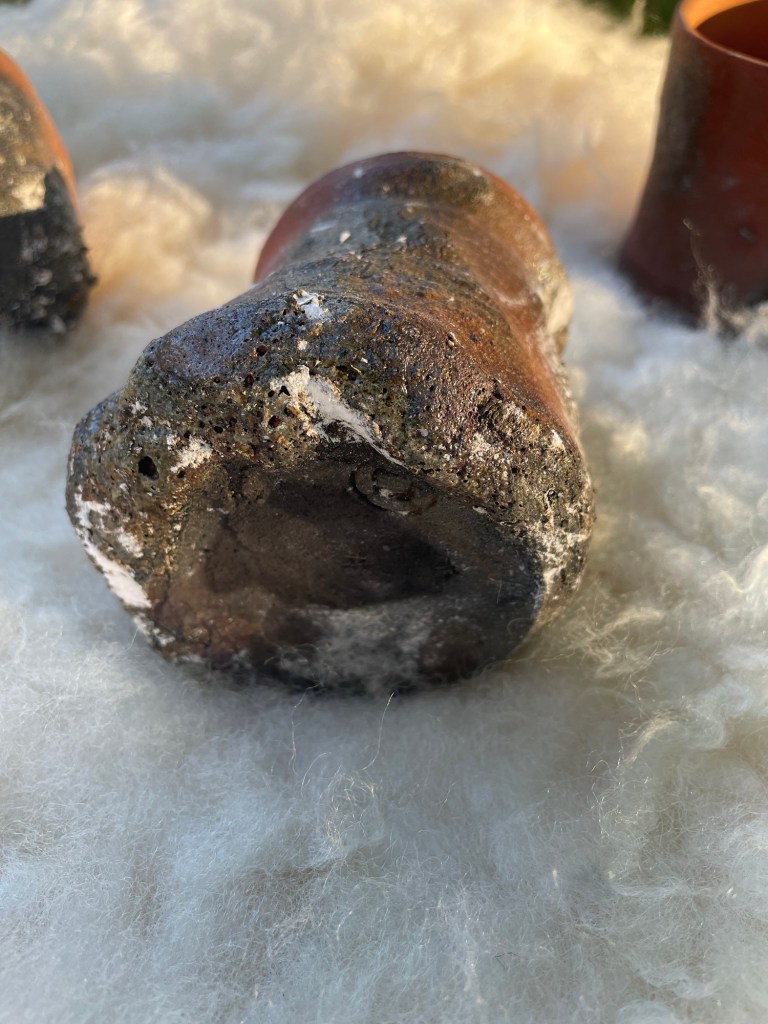
One of the pots shows signs that there may have been some residual moisture in the clay. As the tempurature of the charcoal increased, the outer surface of the pot hardened and the moisture unde the surface got super-heated and turned to steam. The rapid expansion of the moisture caused the clay to pop and spall off.

I plan to do more firings using this method to better my understanding of this technique. I will also be experimenting with adding different oxides( iron, copper, cobalt, etc) to the pots or the firing environment to learn the results created by the use of those oxides.
Bibliography and Footnotes
- http://theantiquesalmanac.com/potteryintheancientworld.htm ↩︎
- Tempurater range based on Orton Cone Chjart where the last hour of firing is at 108 degrees F per hour. https://www.theceramicshop.com/downloads/Ortonconecharttemperatures.pdf ↩︎
- carbon trapping – the clay absorbs carbon and displaces oxygen on the clay body ↩︎
Deforce, Koen & Groenewoudt, Bert J. & Haneca, Kristof. (2020). 2500 years of charcoal production in the Low Countries: The chronology and typology of charcoal kilns and their relation with early iron production. Quaternary International. 593-594. 10.1016/j.quaint.2020.10.020.
Gliozzo, E. Ceramic technology. How to reconstruct the firing process. Archaeol Anthropol Sci 12, 260 (2020). https://doi.org/10.1007/s12520-020-01133-y
Amicone, S., Memmesheimer, A., Solard, B. et al. An interdisciplinary approach to the study of kiln firing: a case study from the Campus Galli open-air museum (southern Germany). Archaeol Anthropol Sci 15, 111 (2023). https://doi.org/10.1007/s12520-023-01798-1
Barouda, A., Quinn, P. & Efstratiou, N. Agios Petros and the Neolithic pottery-making traditions of the deserted islands, Northern Sporades, Greece. Archaeol Anthropol Sci 15, 16 (2023). https://doi.org/10.1007/s12520-022-01713-0
Watkins, James C., and Paul Andrew Wandless. Alternative Kilns & Firing Techniques: Raku, Saggar, Pit, Barrel. Lark, 2007.
Whitehand, Dawn. Pit Firing Ceramics: Modern Methods, Ancient Traditions. Schiffer Publishing Ltd, 2013.
Analog Anthropology Archive. (2013, November 21). Maria Martinez: Indian Pottery of San Ildefonso (Documentary, 1972, VHS) [Video]. YouTube. https://www.youtube.com/watch?v=SkUGm87DE0k
