This document is under revision and updating.
I have done a second firing. Closely matching the first. One of the main differences was the weather conditions were different. The day was not as breezey and the humidty was higher.
I set up the kiln in a similar manner as I did for the first firing.
One change I made was to add a firable container to hold some pyrometric cones to help determine temperature achieved in the firing.
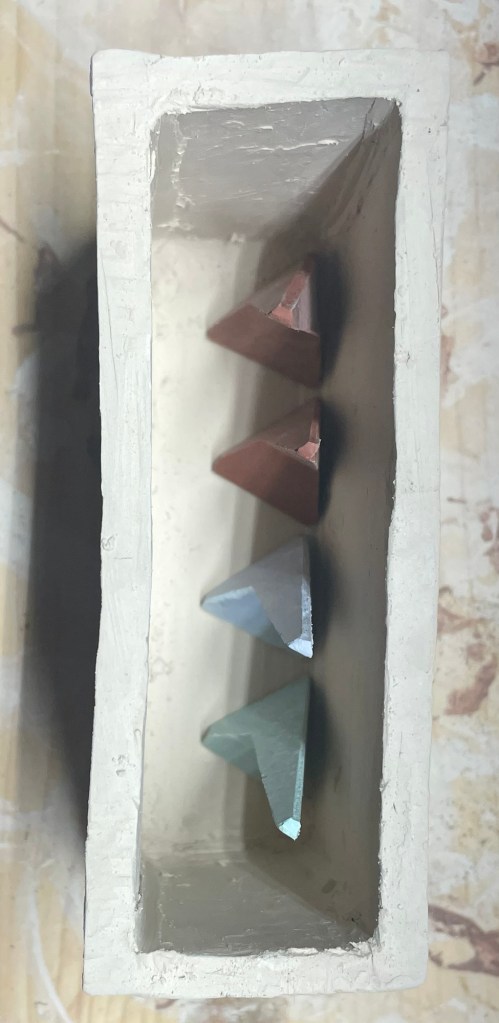
Cones from top to bottom – cone 06(1828F), 04(1945F), 4(2124F), 5(2167F) (Orton Cone Chart1).
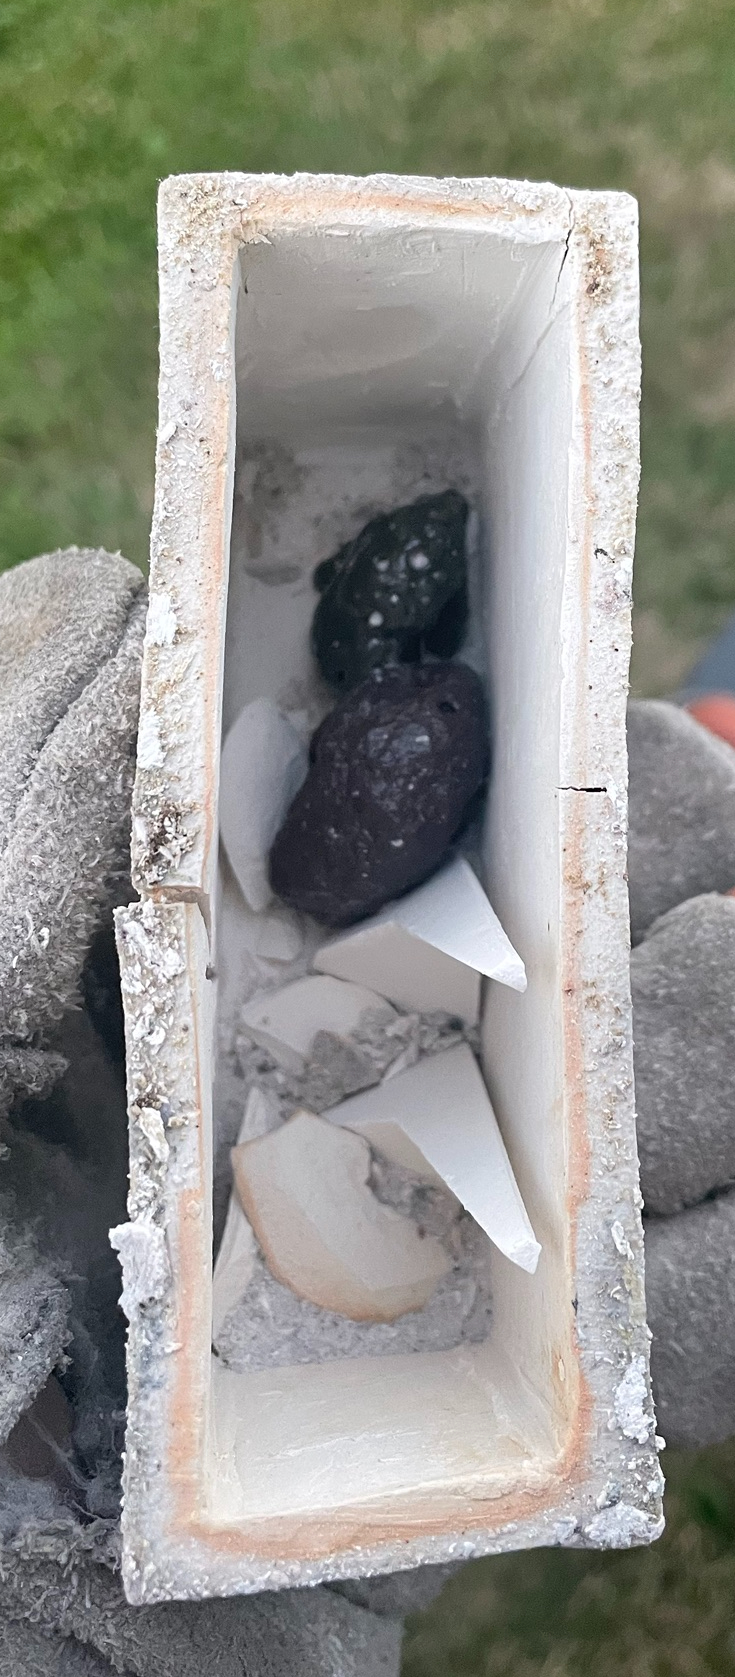
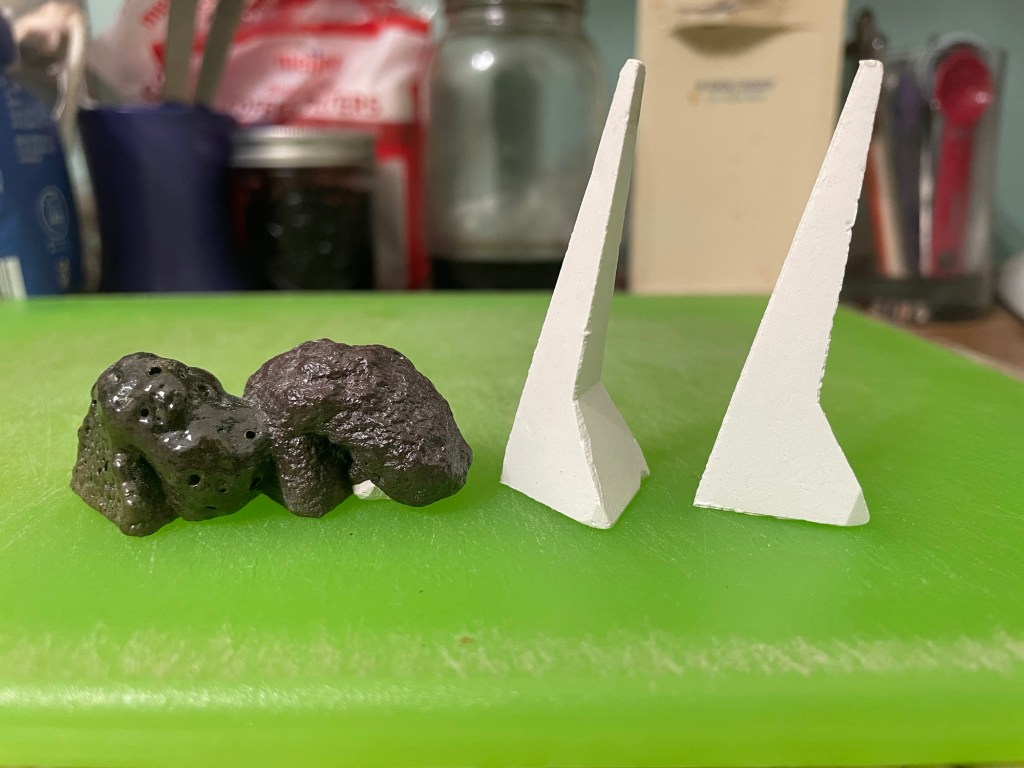
Looking at the middle image; the first two cones are melted blobs of material. This happens when the temperature and amount of time at that temperature has exceeded what the specific cone(s) were designed to withstand. These cones melted due to the temperature exceeding 2000 degrees for more than a few minutes. The other two cones are designed to bend at a higher temperature than was achieved in this firing.
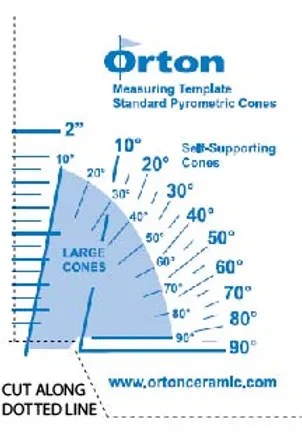
To help determine the heat-work or temperature equivalent, there is a chart2 that can be used to measure the bend of the cone. This bend occurs during the final one to two hours of firing under most circimstances, and there are different rate of temperature rise over time based on whether the potter is trying to achieve a slow, medium or fast firing (mostly gas and electric kilns).
Pyrometric cones are pyrometric devices that are used to gauge heatwork during the firing of ceramic materials in a kiln. The cones, often used in sets of three, are positioned in a kiln with the wares to be fired and, because the individual cones in a set soften and fall over at different temperatures, they provide a visual indication of when the wares have reached a required state of maturity, a combination of time and temperature.
Pyrometric cones give a temperature equivalent; they are not simple temperature-measuring devices.3
In the below images, the pots are loaded into the kiln. The white box contains the 4 cones to measure heat work and give a general idea of the tempurature achieved during the firing.
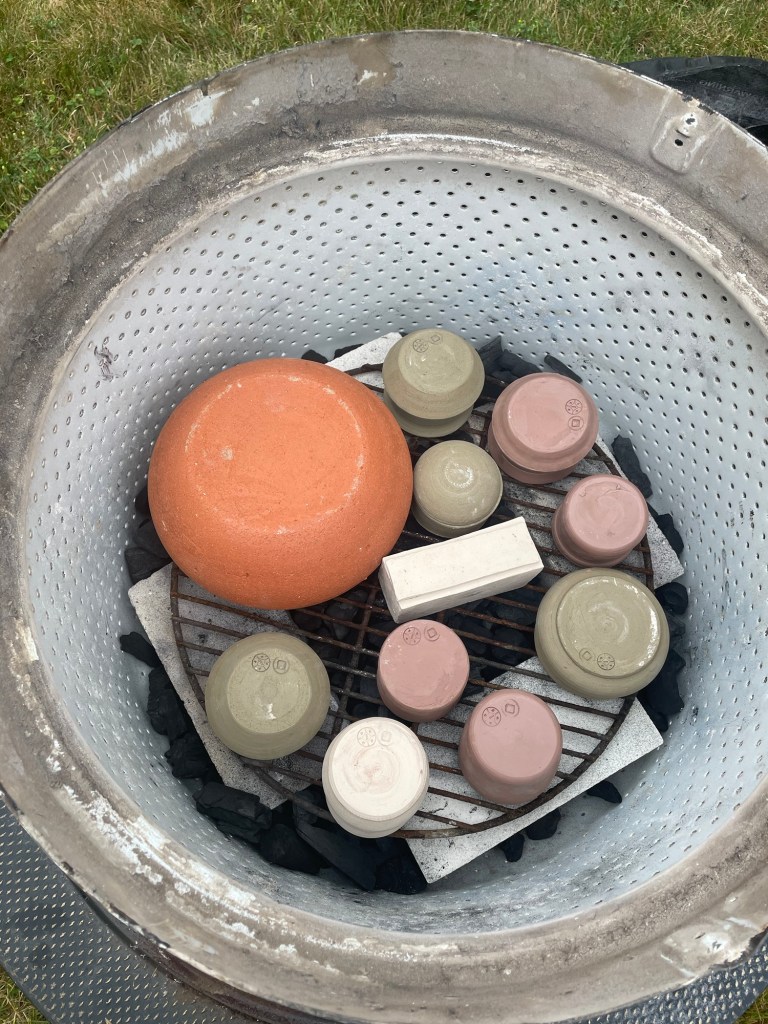

Under the large pot are two samples of the three clays being used in this firing. One pot is the commercial mid-fire clay and the other is the clay that I have dug and processed. The idea behind this was to get pots that were fired in the same kiln at the same time and view the differences.
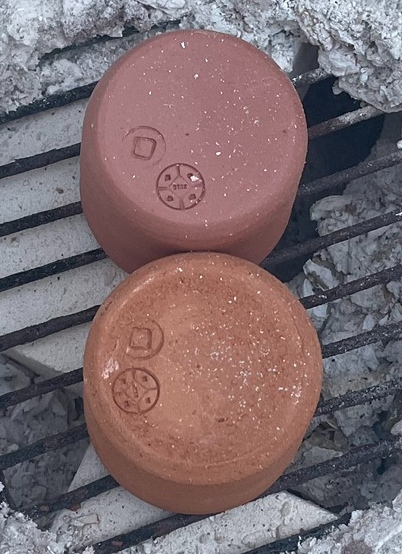
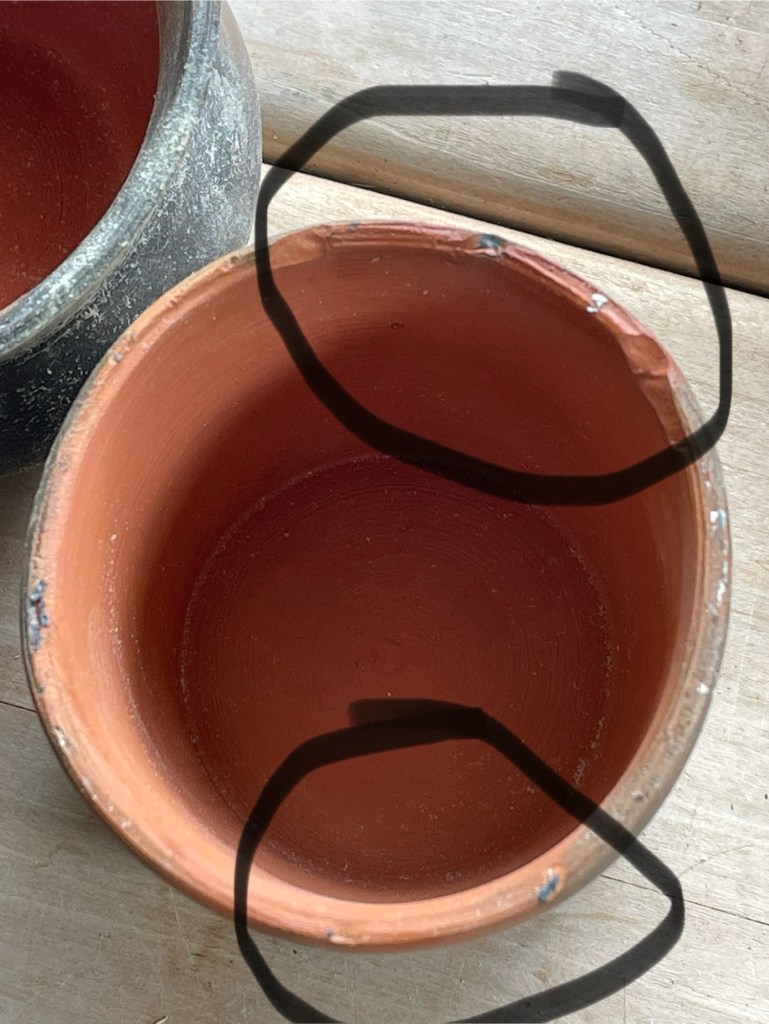
In the above image, these are the covered pots post firing. By apperance, they look as they should if they had been fired in my electric kiln.
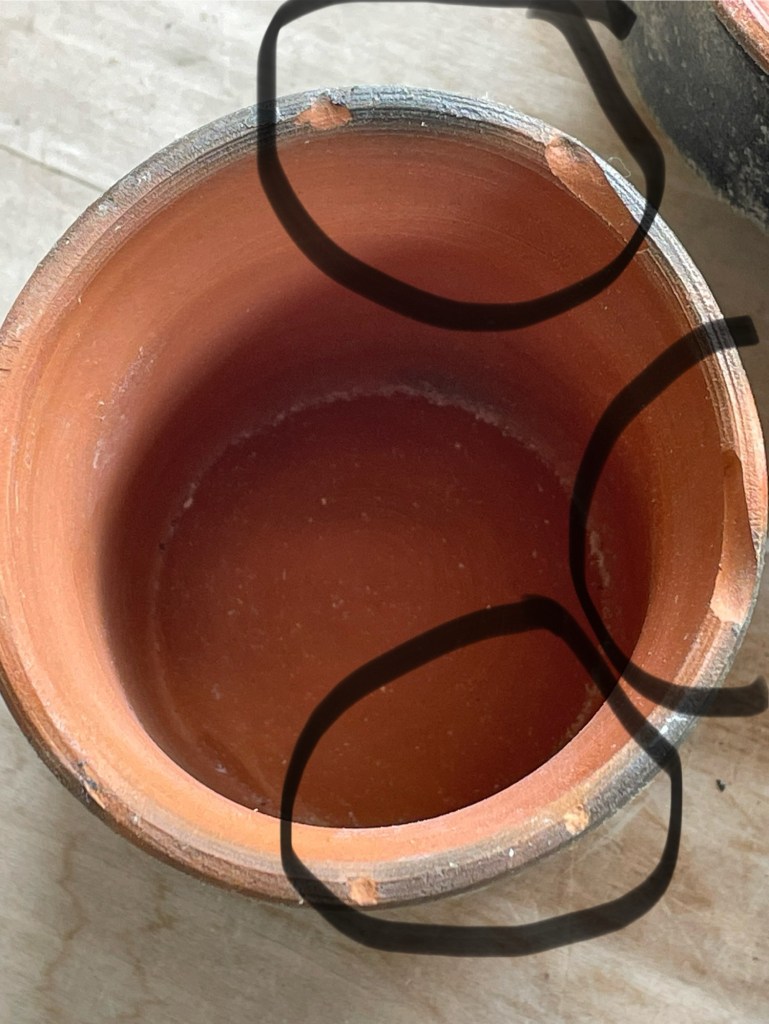
This image shows that on my hand-dug and processed clay, I still have signs of too much heat, The image does not show it as well as in person, but there is eveidence that the tempurature was too hot for this clay. There is bubbling and burning; thus making the clay over-fired and easily broken and not suitable for use.
While this pot is over-fired, it is not as severe as the first pots that were fired in this kiln.
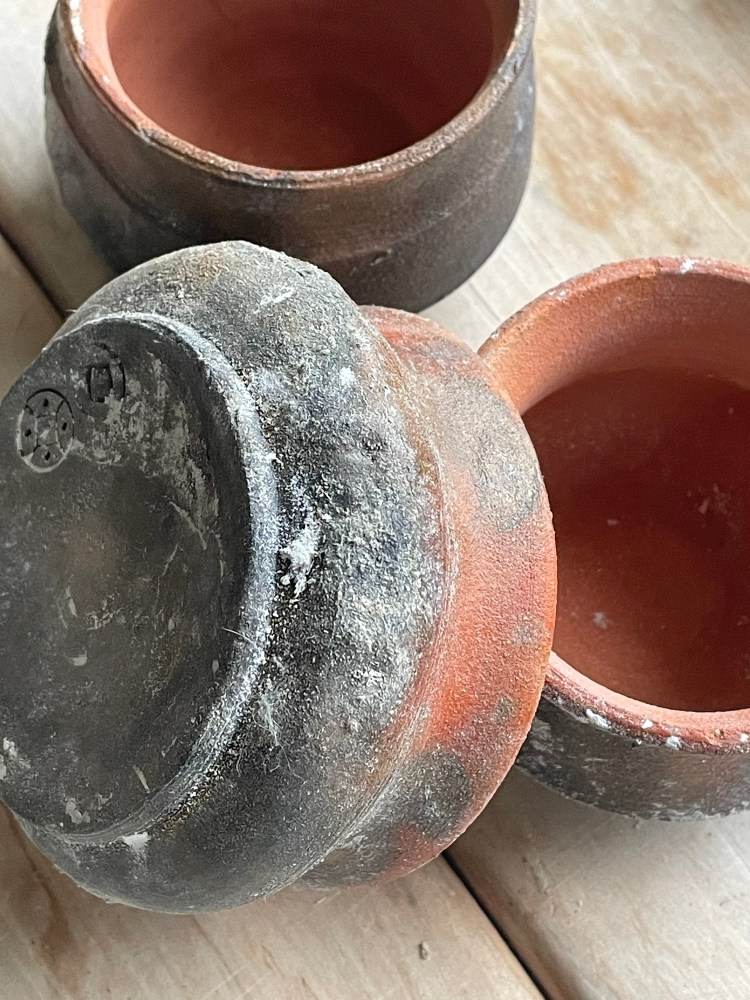
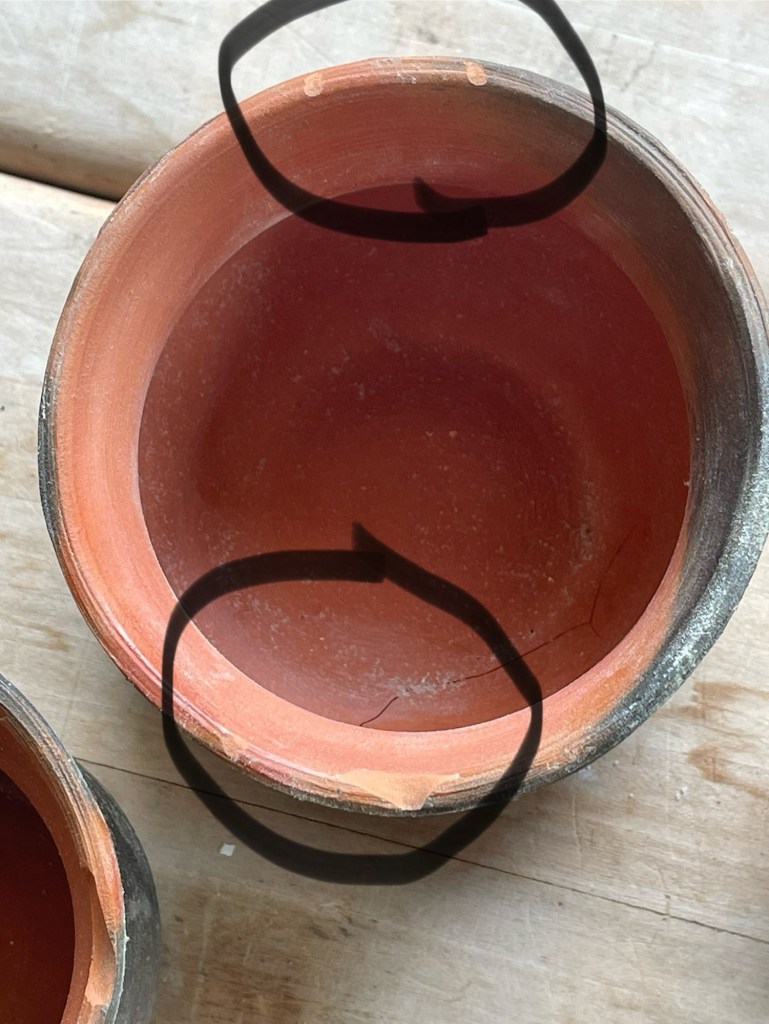
The below images are used to illustrate the marks left behind from the pots sitting on the steel grate.
In the first firing, I did not notice these marks as I was more interested in the condition of the pots and the effect the firing had on them. In this firing, the pots are, in general, in better condition compared to those from the first firing.
As a result of seeing these marks, I have decided I am going to work on making some thick tiles that have holes for air flow, should be able to be used for multiple firings, and will allow the pots to move due to the expansion and contraction cause by the heat of the firing.
Obserevations
I have learned through these two firings, that heat control is a major factor in getting good firing results. To accomplish this, I will be making some panels to reduce the air flow through the washing maching drum I am using for the barrel, making a lid that will help reduce updraft air flow, and possibly making a new barrel out of some other functional item (trash can, small steel barrel, or part of a larger barrel).
I will be doing more experimentation with my hand-processed clay; adding other clays to increase the firing range of the clay, reprocessing the clay to get both a more finely-grained clay and by adding more grog/sand to increase themal resistance.
Conclusion
As of this firing, I have some conclusions.
There is a very strong learning curve when trying to learn how things can be done to emulate a result that was and is still used to make pottery without using modern equipment.
With this kind of kiln, you have some limited options for control. These being, to make some method of controlling how much air flow is allowed into and through the kiln (work in progress – plans to make air control plates), to make a lid for the kiln to also slow down and control the heat in the kiln, and work on the hand-processed clay to make it better able to fire to a slightly higher temperature in this type of kiln.
I also need to make ceramic tiles to place the pots on instead of placing them on the steel grates I have been using. I found that the pots have been sticking to the steel grate and either causing chips in the rim, or worse, causing the pots to crack due to different cooling rates between the pot and the grate.
As I work with this kiln, and study how in-ground pit kilns function, I do see a practicality to the in-ground. The pit kiln has a much better method of controlling air flow; being in the ground – this allows for a slower burn of the combustible materials; the ability to cover the pit with dirt to place the kiln into a reduction atmosphere (removing oxygen from the kiln and pots therein).
However, there is also a practicality to this style of barrel kiln, It allows a potter to fire in a method similar to that used in ancient and medieval periods as well as in some modern indigenous cultures; while living in an urban environment where digging a pit into the ground is either not allowed or is impractical.
The learning continues.
Bibliography and Footnotes
- PYROMETRIC CONES RESOURCES | Orton Ceramic. (n.d.). Orton Ceramic. https://www.ortonceramic.com/pyrometric-cones-resources ↩︎
- Digital Cone Template | Orton Ceramic. (n.d.). Orton Ceramic. https://www.ortonceramic.com/product-page/digital-cone-template ↩︎
- Wikipedia contributors. (2024, July 1). Pyrometric cone. In Wikipedia, The Free Encyclopedia. Retrieved 20:12, July 4, 2024, from https://en.wikipedia.org/w/index.php?title=Pyrometric_cone&oldid=1232056476 ↩︎
